58
English
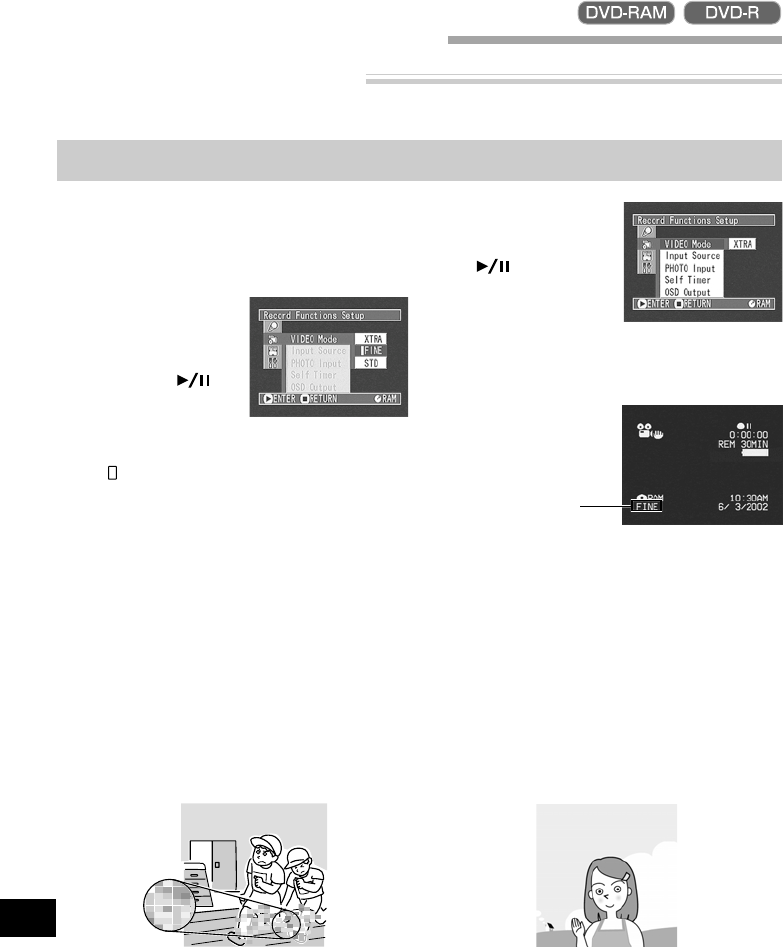
Switching Movie Quality Mode
Choose the movie quality from “XTRA” (only with DVD-RAM disc), “FINE”, “STD” and “LPCM” (only
with DVD-R disc).
However, it is recommended that you record critical subjects in the “XTRA” or “FINE” mode when you
are using a DVD-RAM disc, or in the “FINE” mode with a DVD-R disc.
1
Press the MENU button in the recording pause
status.
The menu screen will appear.
2
Use the joystick to
choose “VIDEO Mode”
on the “Record Func-
tions Setup” screen, and
then press the but-
ton.
Options will be displayed on the right of
“VIDEO Mode”.
The mark will be attached to the currently se-
lected option.
3
Use the joystick to select
the desired quality
mode, and then press
the button.
4
Press the MENU button.
The menu screen will disappear.
Note: The “VIDEO Mode” setting will not change
even after the DVD video camera/recorder is
turned off. However, if “XTRA” has been set with
DVD-RAM disc or “LPCM” has been set with DVD-
R disc, “FINE” will be set when the disc is changed.
Setting Up Record Functions
Block-like noise may appear in recorded image, or the outline of subject image is distored under the
recording conditions listed below: Pan the DVD video camera/recorder as slowly as possible. (Block
noise is likely to appear in the “STD” mode):
•If there is a complicated pattern in background
•If the DVD video camera/recorder is panned or tilted greatly or rapidly
•If subject is moving rapidly even when the DVD video camera/recorder is not moving (as in following
figure on left)
(Image when block-like noise occurs)
(Image without block-like noise)
Movie quality mode
