59
English
Input Selection
If you wish to input an image from another device to this DVD video camera/recorder, you must first
switch the setting on the DVD video camera/recorder.
Refer to the explanation starting from page 92 on how to connect the DVD video camera/recorder to
other devices or record images input from them.
CAMERA
LINE
Usually select this option.
To view image from another device on this DVD video camera/recorder
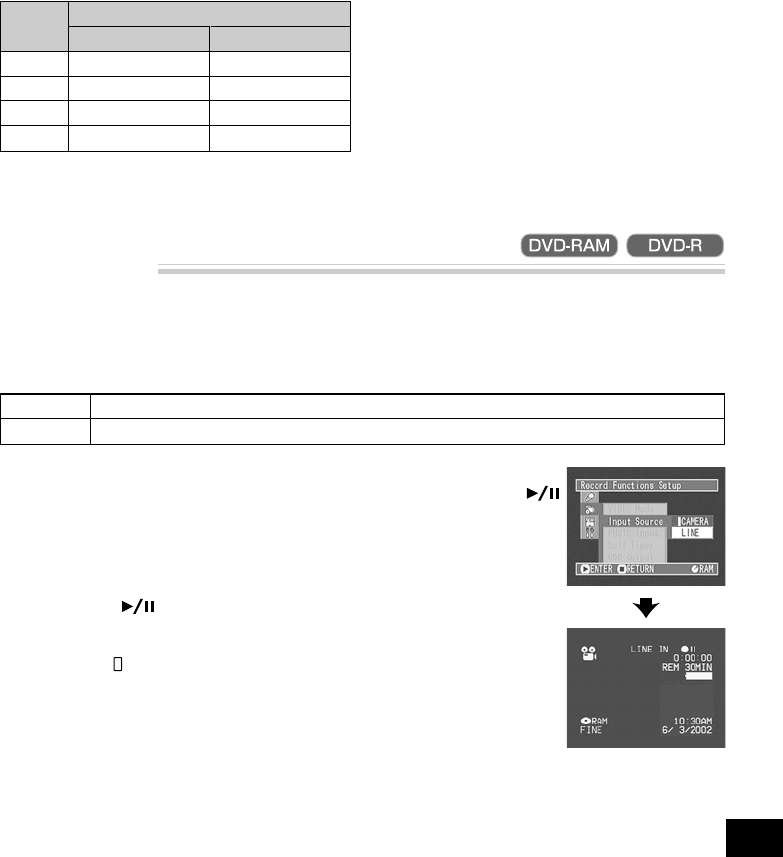
1
Press the MENU button in the recording pause
status.
The menu screen will appear.
2
Use the joystick to choose “Input Source” on the
“Record Functions Setup” menu screen, and
then press the button.
The options will appear on the right of “Input
Source”: The mark will be attached to the cur-
rently selected option.
3
Select the desired option
and then press the
button: The selected op-
tion will be set.
4
Press the MENU button.
The menu screen will
disappear.
Note: The “Input Source” setting will return to
“CAMERA” whenever the DVD video camera/re-
corder is turned off.
● Recordable times in each movie
quality mode (on one side of disc)
Quality
mode
XTRA*
FINE
STD
LPCM
Disc used
DVD-RAM
approx. 18~60 min
approx. 30 min
approx. 60 min
—
DVD-R
—
approx. 30 min
approx. 60 min
approx. 30 min
Note: When using DVD-R disc, you cannot switch
the movie quality mode during recording on the
disc: The DVD video camera/recorder will be au-
tomatically set to the quality mode first used with
the disc for recording.
Note: The setting of movie quality mode is effec-
tive only during movie recording: Switching the
mode will not work during still recording.
The recordable times are only for reference.
* The recordable times will vary depending on
recording contents.
