73
English
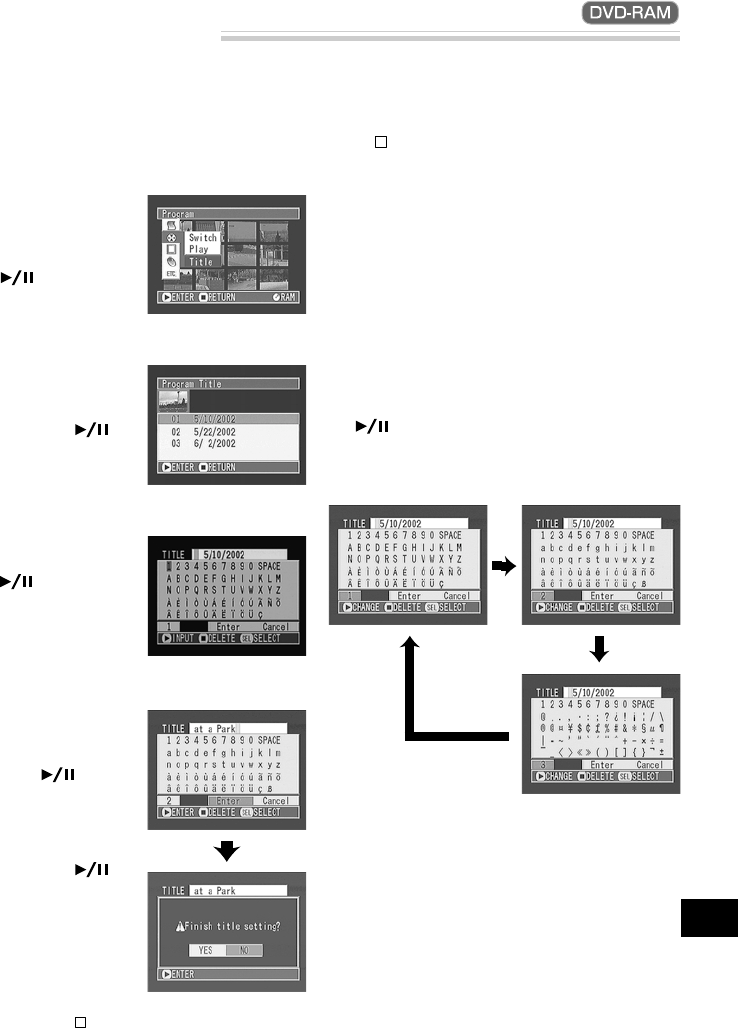
Changing Title of Program
1
Press the DISC NAVIGATION button and then
the MENU button.
The Disc Navigation menu screen will appear.
2
Use the joystick to
choose “Title” on the
“Program” menu
screen, and then press
the button.
The “Program Title”
screen will appear.
3
Use the joystick to select
the program whose title
you want to change, and
then press the but-
ton.
The screen for entering
a title will appear.
4
Use the joystick to select
a letter and then press
the button: The se-
lected letter will be en-
tered.
Repeat this procedure to create a title.
5
After entering the title,
use the joystick to
choose “Enter” and then
press the button.
The screen for verifying
the entered title will ap-
pear: Choose “YES” and
then press the but-
ton.
After the following mes-
sage appears, the thumb-
nail display screen of the
program whose title was
set will be restored.
Choosing “NO” or
pressing the button
will restore the screen
for inputting a title.
The recording date/time has initially been attached to any program: You can change the recording date/
time to any desired title.
Note: If you wish to delete the letter for title, press
the
button once: The input letter will be deleted.
Holding down the stop button will delete all letters
in the TITLE column. You can also use the DELETE
button on remote control to delete any input let-
ters.
Note: To cancel the setting of title, choose “NO”
on the screen for verifying the entered title: The
screen for verifying cancellation of title setting will
appear. To cancel title setting, choose “YES”.
● Characters available for entering
title
You can select characters from the “capital letter”,
“small letter” and “symbol” input modes.
With step 4, select the input mode and then press
the button, or press the DISPLAY button on
the DVD video camera/recorder.
Input mode
