


GETTING STARTED
10 EN
MasterPage: Left
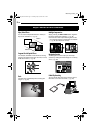
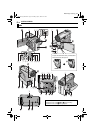
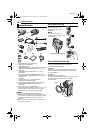
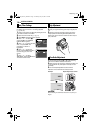
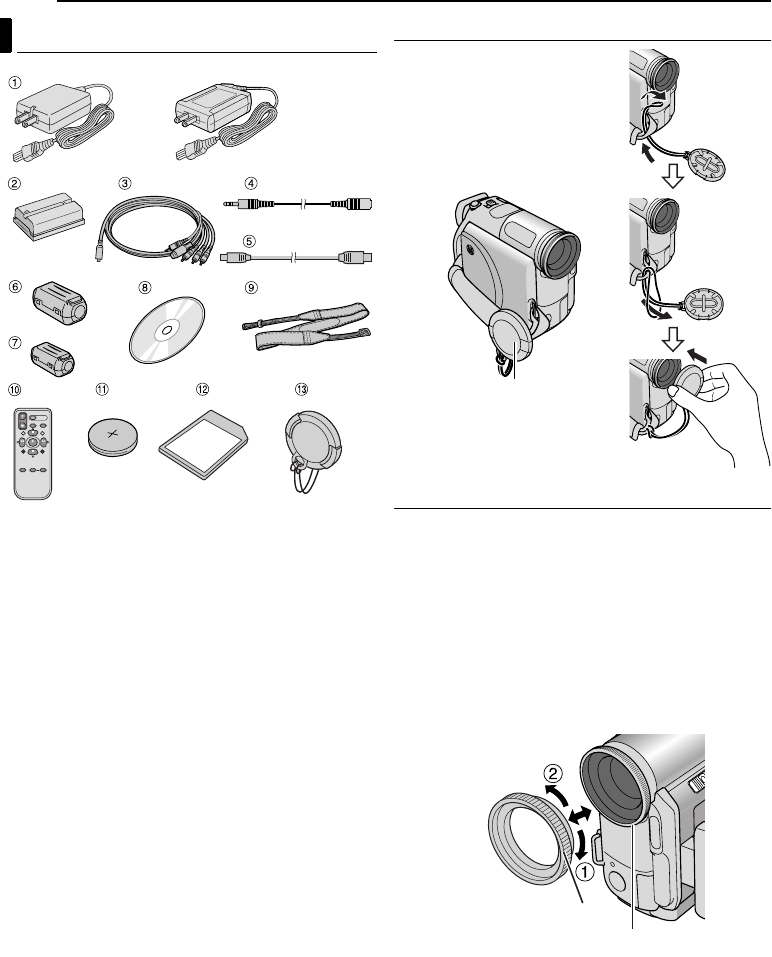
a AC Adapter AP-V14U or AP-V15U
b Battery Pack BN-V408U-B
c S/AV/Editing Cable
d Audio Extension Cable X 2 (for connection of optional
Headphone And External Microphone ੬ pg. 11)
e USB Cable
f Core Filter [large] (for USB Cable ੬ pg. 11 for
attachment)
g Core Filter [small] (for S/AV/Editing Cable, Audio
Extension Cable and AC Adapter’s cord ੬ pg. 11 for
attachment)
h CD-ROM
i Shoulder Strap (੬ pg. 10 for attachment)
j Remote Control Unit RM-V720U
k Lithium Battery CR2025* (for remote control unit)
l Memory Card 8 MB (Already inserted in the
camcorder)
m Lens Cap (੬ pg. 10 for attachment)
* A lithium battery is pre-installed in the Remote Control Unit
at time of shipment (with insulation sheet). To use the
Remote Control Unit, remove the insulation sheet.
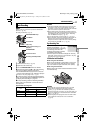
NOTES:
● In order to maintain optimum performance of the
camcorder, provided cables may be equipped with one or
more core filter. If a cable has only one core filter, the end
that is closest to the filter should be connected to the
camcorder.
● Make sure to use the provided cables for connections. Do
not use any other cables.
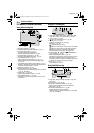
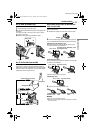
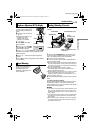
How To Attach The Lens Cap
To protect the lens, attach the
provided lens cap to the
camcorder as shown in the
illustration.
NOTE:
To confirm the lens cap is on
correctly make sure the cap is flush
to the camcorder.
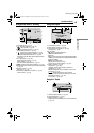
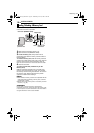
How To Attach/Detach The Lens Ring
The provided lens ring helps block out glare when
shooting under bright sunlight, the same way
professional photographers do.
To attach:
Align the lens ring with the camcorder’s lens while the
index on the lens ring is facing upward, and then screw
the ring clockwise a.
To detach:
Turn the ring counterclockwise b.
Normally, use the camcorder with the lens ring only when
you are not using the optional wide or telephoto
conversion lens.
Provided Accessories
OR
Place here during shooting.
Index
Threading
Ring
GR-DZ7US_04Start.fm Page 10 Monday, July 5, 2004 6:06 PM