Maintaining the Equipment
August 2001 4-7
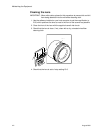
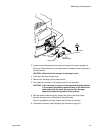
3. Position the red balance-filter selection handle of the balance-filter assembly
in the center.
CAUTION: Use care with the IR filter. It is not secured in place. (For more
information about the IR filter, see Replacing the (Square) IR
Filter on page 4-8.)
4. Hold the red handle and pull the assembly straight out from the scanner.
5. Clean the filters with the camel’s-hair brush or, if needed, replace the filter(s)
as described in the next step.
6. Replace the balance filters:
a. Remove the 3 screws.
b. Remove the filter retainer.
c. Remove the old filters and place the new filters in the filter holder.
The filters are coated on both sides. It is not important which side faces up
or down.
d. Secure the filters with the retainer and the 3 screws.
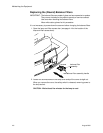
7. Install the filter assembly in the scanner with the balance-filter selection
handle in the middle.
8. Reinstall the lamp cover, tighten the thumbscrews, and select a filter position.
9. Calibrate the scanner (see Calibrating the Scanner on page 3-4).


