


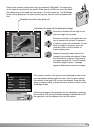
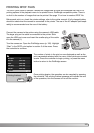
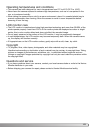
Connect the camera to the printer using the camera’s USB cable.
The larger plug on the cable is connected to the printer. Slide
open the USB-port cover and insert the smaller plug of the cable
into the camera (1).
Turn the camera on. Open the PictBridge menu (p. 100). Highlight
“Start” in the DPOF-print option in section 3 of the menu. Press
the controller to continue.
103
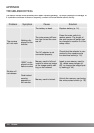
The DPOF-print option in section 3 allows still images and an index print selected with the DPOF
printing options in the playback menu to be printed from a PictBridge compatible printer. There is
no limit to the number of images that can be printed. See page 74 on how to create a DPOF file.
Before each print run, check the printer settings; refer to the printer manual. A fully charged battery
should be used when the camera is connected to the printer. The use of the AC adapter (sold sepa-
rately) is recommended over the use of the battery.
PRINTING DPOF FILES
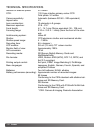
Once printing begins, the operation can be canceled by pressing
the controller. The printing finished message will indicate the end
of the operation; turn the camera off to end the routine.
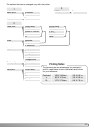
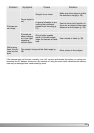
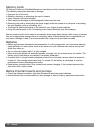
The number of prints in the print run are displayed as well as the
print parameters selected with the menu. Index prints are counted
as one. Press the controller to begin printing, or press the menu
button to return to the PictBridge screen.
No. of prints
Paper size
Data print
: 7
Print quality
Layout
:start
:Printer setup
:Printer setup
:Printer setup
:Printer setup
Printing finished.
OK
1