Wireless-B Internet Video Camera
List of Figures
Figure 3-1: Camera LEDs 6
Figure 3-2: Camera Head 6
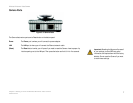
Figure 3-3: Camera Ports 7
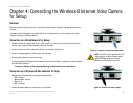
Figure 4-1: Connect the Ethernet Network Cable 8
Figure 4-2: Connect the Power Adapter 8
Figure 5-1: Welcome 10
Figure 5-2: Connection for Setup 10
Figure 5-3: Cameras Found 11
Figure 5-4: Administrator Name and Password 11
Figure 5-5: Basic Settings 11
Figure 5-6: DHCP or Static IP Address 12
Figure 5-7: IP Settings 12
Figure 5-8: Mode Settings 13
Figure 5-9: Basic Settings (Wireless) 13
Figure 5-10: Security Settings 14
Figure 5-11: Security Settings (WEP Key) 14
Figure 5-12: Review New Settings 15
Figure 5-13: Congratulations 15
Figure 5-14: Stand Option 16
Figure 5-15: Wall Mount Option 16
Figure 6-1: Install Viewer & Recorder Utility 17
Figure 6-2: Install Viewer & Recorder Utility Welcome 17
Figure 6-3: Choose Destination Location 18
Figure 6-4: Select Program Folder 18
Figure 6-5: OCX Plug-in 18
Figure 6-6: Setup Complete 18
Figure 6-7: Viewer & Recorder Utility Icon 19
Figure 6-8: Main Screen 19


