40
Clip management
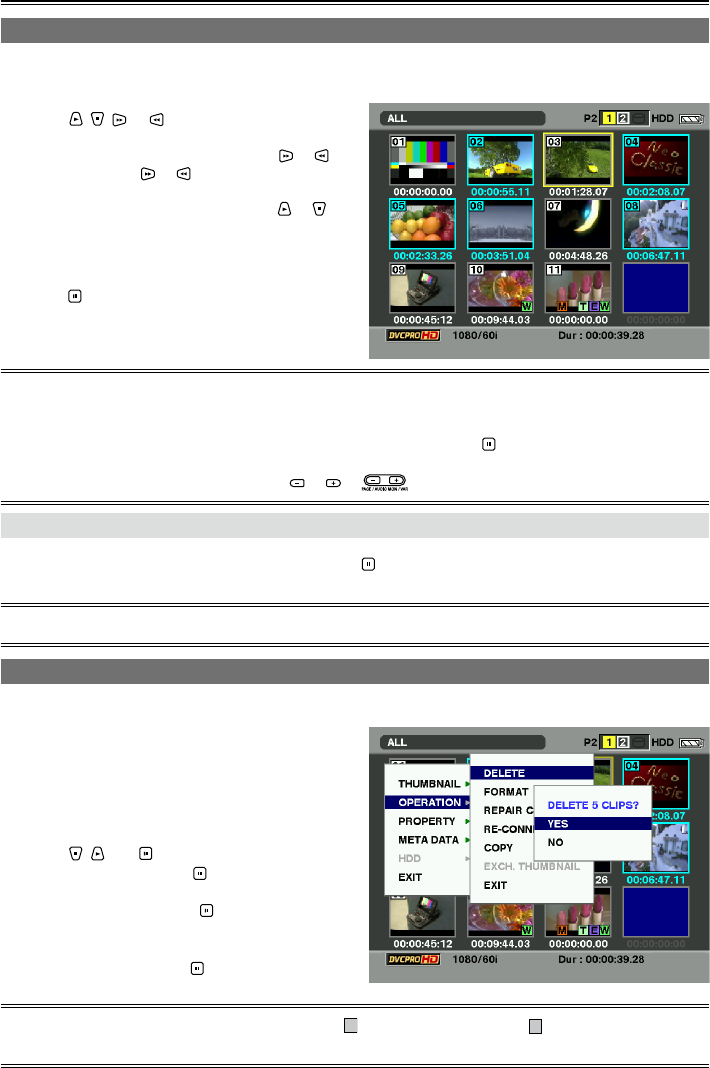
Selecting clips
When performing operations on the thumbnail display screen, select the clip which will be the target of
these operations as follows.
1 Using , , or , move the cursor (yellow
frame) to the target clip.
To move the cursor to left or right, use or .
You can also use or by pressing and holding
[ALT/3].
To move the cursor up and down, use or by
pressing and holding [ALT/3].
This operation on the rest of the pages in this
manual is referred to as “cross cursor operation”.
2 Press .
A bluish-green frame now appears at the clip
where the cursor is positioned to indicate that the
clip has been selected.
To allocate functions to the USER buttons, refer to “USER button” (Page 32).
[ALT/3] does not work when ALT function is not allocated to [ALT/3].
By repeating steps 1 and 2, you can select a multiple number of clips.
If you select a clip and move the cursor to another clip, and then press while pressing and holding
[ALT/3], you can select from the last selected clip until the clip at the cursor position at a time.
To move from one page to another, press or of .
To release the selection
1 Move the cursor to the selected clip, and press again.
The selection is released.
By pressing [EXIT/2] while pressing [ALT/3], you can cancel the selection of the selected clips all together.
•
•
•
•
•
•
Deleting clips
You can delete unwanted clips from the P2 card by proceeding as follows.
1 Display the thumbnail display screen.
2 Select the clips to be deleted.
3 Press [MENU/MODE CHK].
4 Using , and , select “OPERATION”
– “DELETE”, and press .
5 Select “YES”, and press .
6 When the completion message has
appeared, press “OK” ( ).
It may not be possible to delete clips for which the
defective clip indicator or
unknown clip indicator is
displayed.
•
