


Indoor Pan/Tilt Head AW-PH400
16
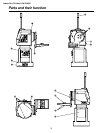
Installation (Be sure to ask your dealer to install the unit.)
$ Installing the pan/tilt head
When installing the pan/tilt head, follow the instructions below carefully.
In order to prevent accidents resulting when the product becomes dislodged or falls down, be absolutely sure to proceed as
instructed. Do not install the pan/tilt head on its side since its prescribed operation and performance cannot be ensured.
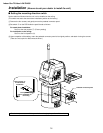
≥ After the pan/tilt head has been installed, mount the camera on it.
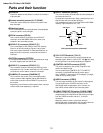
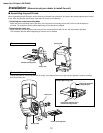
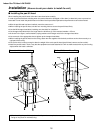
≥ When installing the pan/tilt head, use the four mounting holes to secure the pan/tilt head firmly.
≥ Use the M6 hexagon head bolts (including one short bolt) for installation.
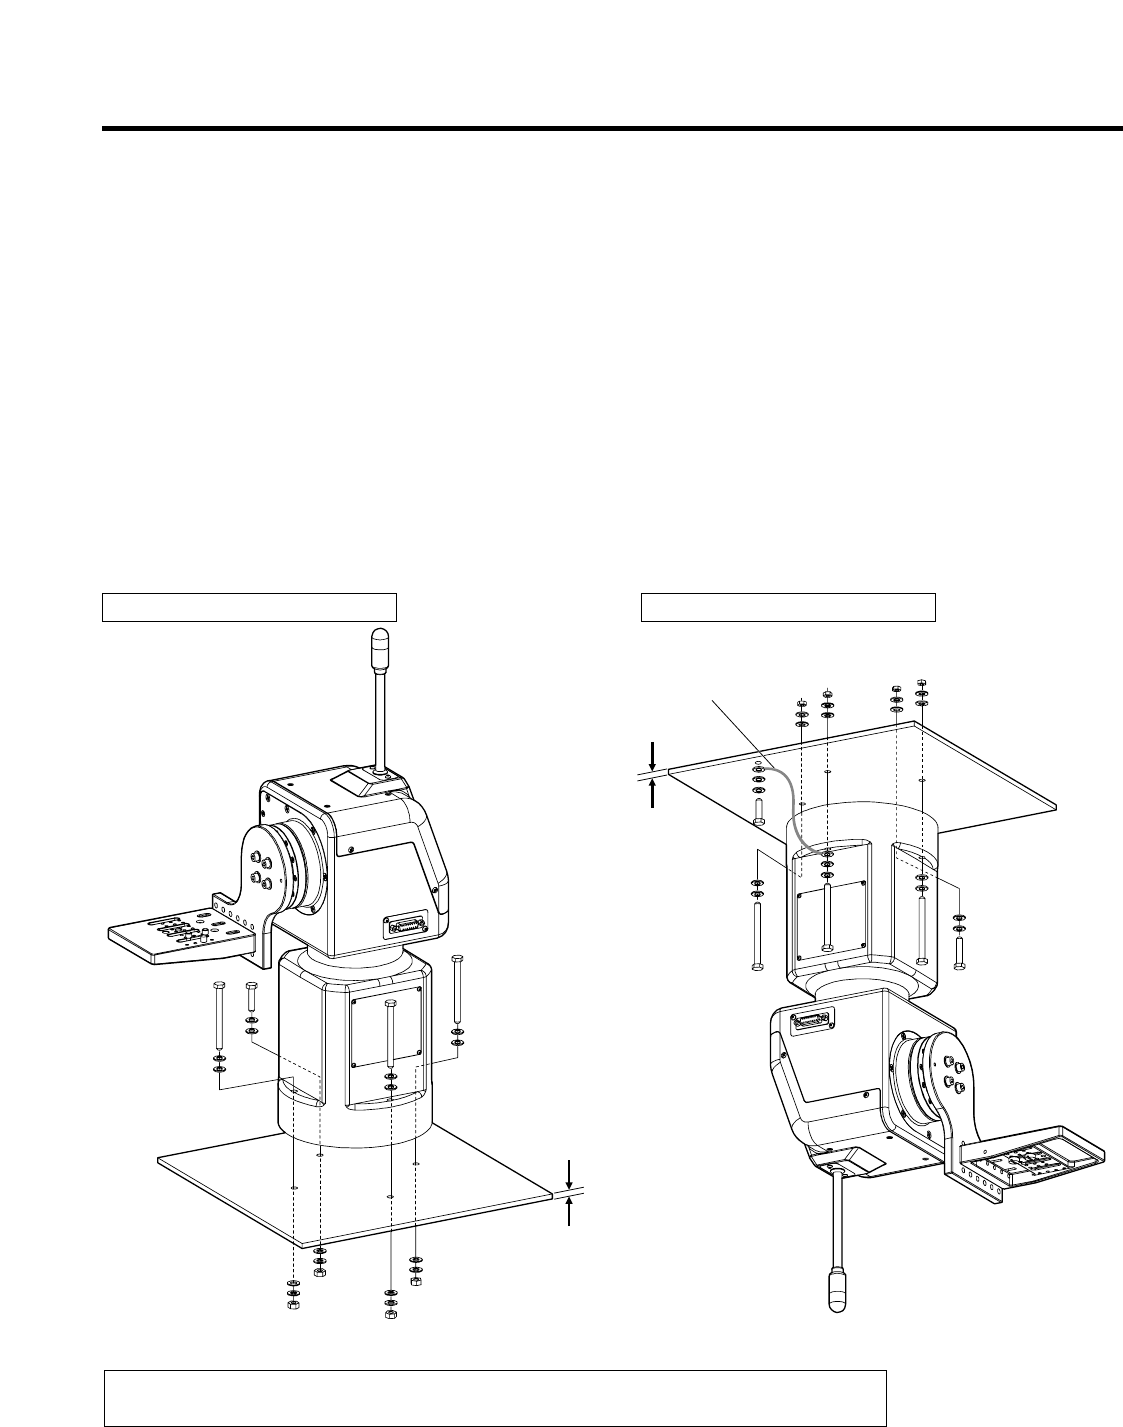
≥ Use hexagon head bolts which are longer than the thickness (t) of the mounted member + 25 mm.
≥ As shown in the figure, use flat washers, spring washers and hexagon nuts for the hexagon head bolts.
≥ Use a wrench of the appropriate size to tighten up the hexagon head bolts.
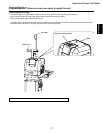
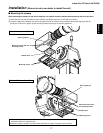
≥ When installing the pan/tilt head on the ceiling, attach the wire together with the bolts, and then anchor them securely to a
rigid part of the ceiling.
≥ Use a wire which is strong enough to bear the weight of the entire pan/tilt head (pan/tilt head, camera and lens cable).
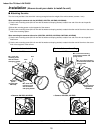
≥ Install the pan/tilt head in such a way that the equipment and cable attached to it will not make contact with any surrounding
objects when the head is swiveled.
❈ When installing the pan/tilt head, do not forcibly turn the rotary head or rotary arm manually.
Doing so may result in malfunctioning.
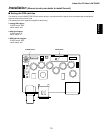
t
t
For a stand-alone installation For installation on the ceiling
Wire