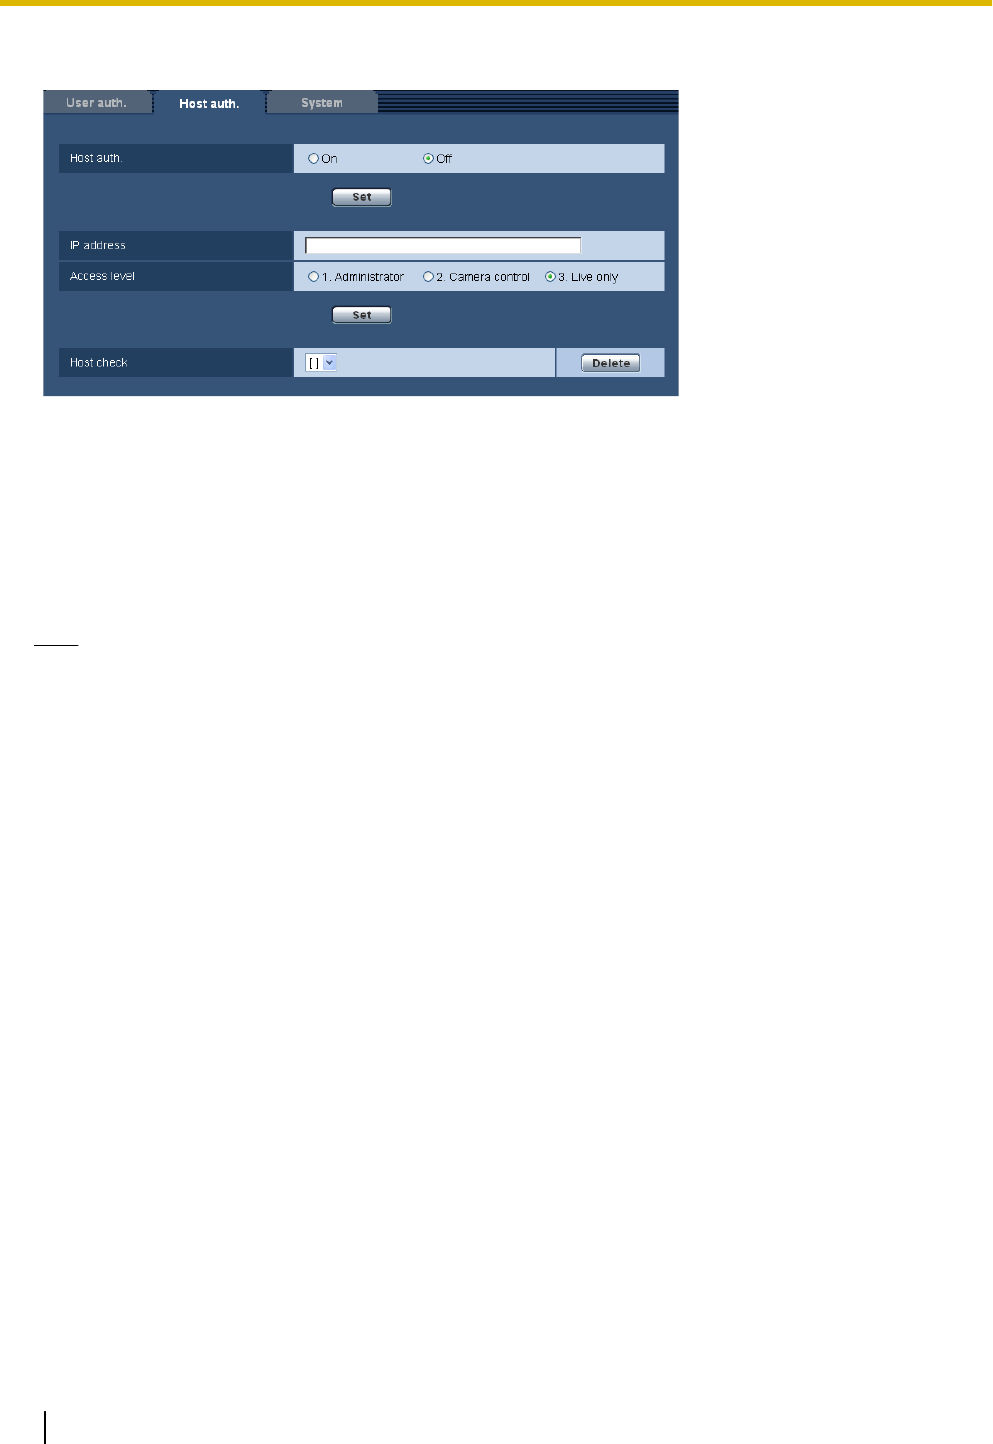
The restriction settings of PCs (IP address) from accessing the camera can be configured on this page.
[Host auth.]
Select “On” or “Off” to determine whether or not to authenticate the host.
• Default: Off
[IP address]
Enter the IP address of the PC to be allowed to access the camera. Host name cannot be entered for the IP
address.
Note
• When “IP address/subnet mask” is entered, it is possible to restrict PCs in each subnet. For example,
when “192.168.0.1/24” is entered and “2. Camera control” is selected for the access level, the PCs
whose IP address is between “192.168.0.1” - “192.168.0.254” can access the camera with the access
level “2. Camera control”.
• When the IP address already in use is entered and the [Set] button is clicked, the respective host
information will be overwritten.
[Access level]
Select the access level of the host from the following.
1. Administrator/ 2. Camera control/ 3. Live only
Refer to page 94 for further information about the access level.
• Default: 3. Live only
[Host check]
From the pull-down menu of “Host check”, the registered host can be selected and the selected host’s IP
address can be checked.
The registered IP address will be displayed with the access level.
(Example: 192.168.0.21 [1])
To delete the registered host, click the [Delete] button after selecting the IP address to be deleted.
13.3 Configure the settings relating to the priority
stream [System]
Click the [System] tab on the “User mng.” page. (®page 34, page 35)
96 Operating Instructions
13 Configure the settings relating to the authentication [User mng.]


