28 VQT2R20 VQT2R20 29
For details about the setting procedure in the [SETUP] menu (→20)
Using the [SETUP] menu (Continued)
Item Settings, notes
[VERSION DISP.]
Check the version of the
camera firmware.
Current version is displayed.
[FORMAT]
Use when [BUILT-IN
MEMORY ERROR]
or [MEMORY CARD
ERROR] appears, or
when formatting the built-
in memory or card.
When a card/built-in
memory is formatted,
the data cannot be
restored. Check the
content of the card/
built-in memory
carefully before
formatting.
[YES]/[NO]
• This requires a sufficiently charged battery (→11), or an
AC adaptor (optional) and DC coupler (optional). When
formatting the built-in memory, remove the cards.
(Only inserted card will be formatted if present; built-in
memory will be formatted if no card is inserted.)
• Always format cards with this camera.
• All picture data including protected pictures will be
deleted. (→135)
• Do not turn off power or perform other operations during
formatting.
• Formatting the built-in memory may take several
minutes.
• Consult your nearest Service Center if format cannot be
successfully completed.
[LANGUAGE]
Change display
language.
Set the language displayed on the screen.
For details about the setting procedure in the [SETUP] menu (→20)
[DEMO MODE]
View demonstration of
functions.
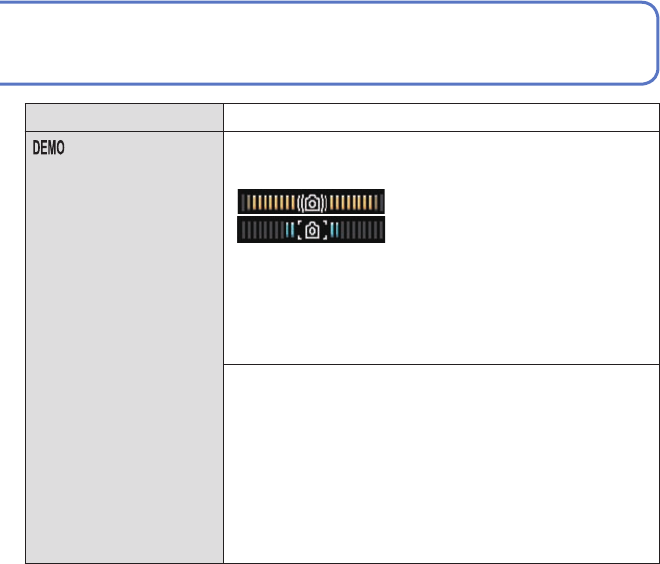
[STABILIZER DEMO.]: (Only during recording)
Extent of jitter is shown on graph (estimate)
Large ← Small → Large
Extent of jitter
Extent of jitter after correction
• During demo screen display, the Optical Image Stabilizer
switches ON and OFF every time [MENU/SET] is
pressed.
• Cannot display during Playback Mode.
• To stop→ Press the [DISPLAY] button.
• Recording and zoom cannot be performed during demo.
[AUTO DEMO]: View introductory Slide Show
[OFF]/[ON]
• To close → Press [MENU/SET]
• When a card is not inserted, Automatic Demo Mode
will start if there is no operation for about two minutes
with the power ON when connected to the AC adaptor
(optional) and DC coupler (optional).
• [AUTO DEMO] cannot be displayed on external devices
such as TVs.
Item Settings, notes
