


22
20t W
T
D.ZOOM
1
2
W
T
4
3
1
W.B./SHUTTER/IRIS/
MF/VOL/JOG
PUSH
12
EIS
1
1
W.B./SHUTTER/IRIS/
MF/VOL/JOG
PUSH
12
1 2
2
1, 3
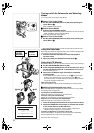
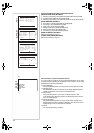
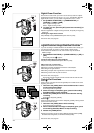
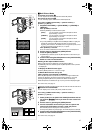
Digital Zoom Function
This function is useful when you want to record close-up shots of subjects
located beyond a normal zoom range of 1k to 10k magnification. With the
Digital Zoom Function, you can select a magnification of 25k or 200k.
1
Set [CAMERA FUNCTIONS] >> [CAMERA SETUP] >>
[D.ZOOM] >> [25t
tt
t
] or [200
t
tt
t
]
≥25k: Digital zooming to 25k
≥200k: Digital zooming to 200k
2
To zoom in or out, press the [W/T] zoom lever towards [T] or
towards [W].
≥As the magnification of digital zooming increases, the quality of image may
deteriorate.
Canceling the Digital Zoom Function
Set [D.ZOOM] on the [CAMERA SETUP] Sub-menu to [OFF].
≥For other notes, see page 60.
~~~~~~~~~~~~~~~~~~~~~~~~
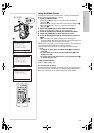
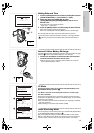
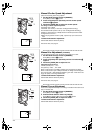
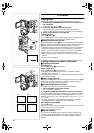
Digital Electronic Image Stabilizer Function
If you are recording in unstable situations and the Palmcorder is shaky, you
can use this function to correct for camera shake in these images.
≥If the Palmcorder shakes too much, this Function may not be able to
stabilize images.
1
Set [CAMERA FUNCTIONS] >> [CAMERA SETUP] >> [EIS] >>
[ON].
≥The [EIS] Indication
1
appears.
Canceling Digital Electronic Image Stabilizer
Set [EIS] on the [CAMERA SETUP] Sub-Menu to [OFF].
EIS function may not work when...
≥Palmcorder movement is too extreme.
≥Recording a subject with distinct horizontal or vertical stripes.
≥Recording in low light situations.
≥Recording a subject under a great amount of fluorescent light.
≥Recording a scene with very fast movement.
≥For other notes, see page 60.
~~~~~~~~~~~~~~~~~~~~~~~~
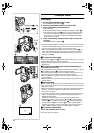
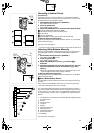
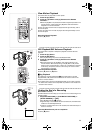
Fade In/Out Functions
Fade In
1
Fade In brings out images and sounds gradually from a black screen at the
beginning of a scene.
1
Hold down the [FADE] Button while the Palmcorder is set to
the Recording Pause Mode.
≥The image fades out gradually.
2
When the image is completely gone, press the Recording
Start/Stop Button to start recording.
3
Release the [FADE] Button about 3 seconds after starting
recording.
≥The image reappears gradually.
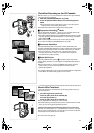
Fade Out
2
Fade Out causes images and sounds to disappear gradually, leaving a black
screen at the end of a scene.
1
Hold down the [FADE] Button while recording.
≥The image fades out gradually.
2
About 3 seconds after the image is completely gone, press
the recording Start/Stop Button to stop recording.
3
Release the [FADE] Button.
≥Fade in/out function cannot be used in MPEG4 Recording Mode (l 38),
PhotoShot Recording Mode, or Still Picture Mode (l 21).
≥For other notes, see page 60.