


7
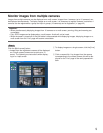
In this case, the camera will not move when the
thumbnail image is clicked. (For example, when pre-
set position 3 is unregistered, the thumbnail image
of preset position 2 will be displayed as the thumb-
nail image of preset position 3. The camera will not
move when the thumbnail image of preset position 3
is clicked.)
• The camera will not always returns to the exactly
same position where it was before "360° map-shot"
or "Preset map-shot" was carried out. (It may some-
times be slightly different.)
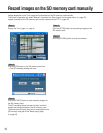
• The window on which the thumbnail images are dis-
played will close when Clicking the following buttons
that can switch the camera channel or reload
images.
[Live] button, multi-screen buttons, image type but-
tons ([MPEG-4]/[JPEG]), image capture size buttons
([VGA]/QVGA), full screen button, [Setup] button
(☞ pages 5 - 7)
To display the thumbnail images again, carry out
"360° map-shot" or "Preset map-shot" again.
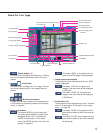
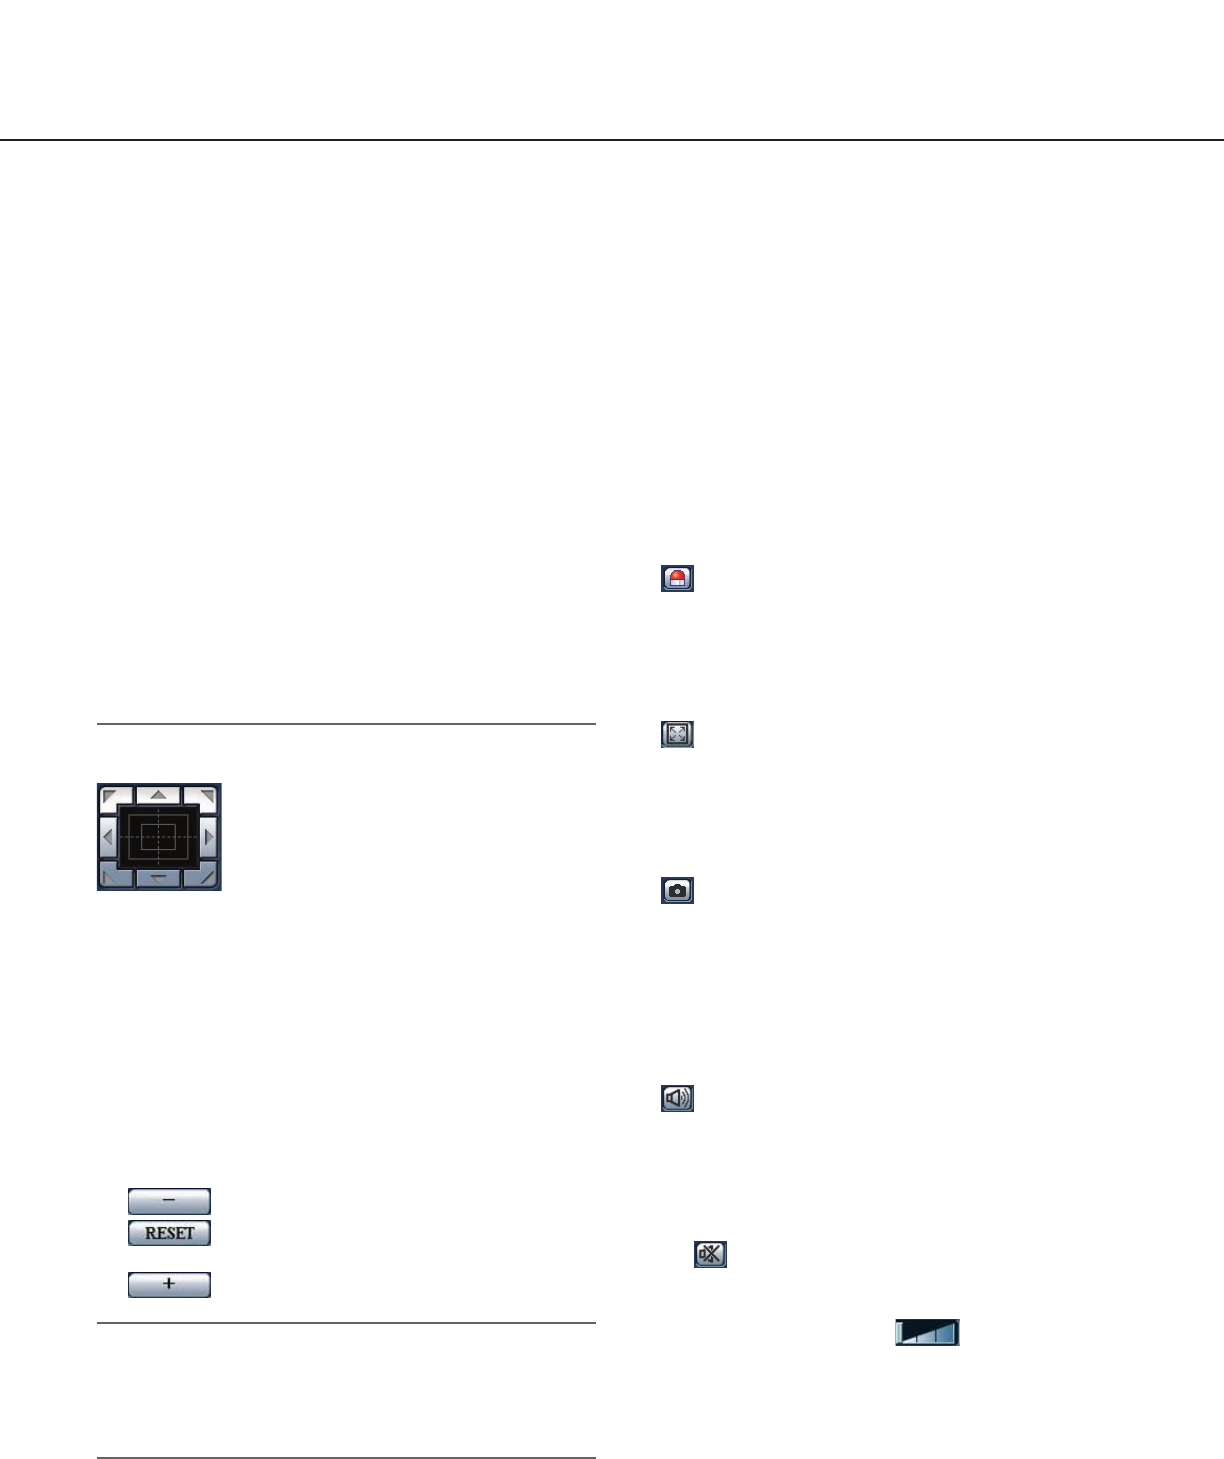
!1 Control pad/buttons (*2)
: Left-click on the control pad to adjust
the horizontal/vertical position of the
camera (panning/tilting).
Panning/tilting speed will be faster if a
clicked point gets farther from the cen-
ter point of the control pad.
It is also possible to pan/tilt the camera by dragging the
mouse.
Zoom and focus can be adjusted by right-clicking. When
an upper/lower area of the control pad is right-clicked,
the displayed image will be zoomed in/out on. When a
left/right area is right-clicked, the focus will be adjusted
to the NEAR/FAR side.
Zoom can also be adjusted using the mouse wheel.
!2 BRIGHTNESS buttons (*2)
: The displayed image will be darker.
: The adjusted brightness will return to the
default brightness.
: Image will be brighter.
Note:
When the BRIGHTNESS buttons are clicked while
the camera is at the preset position, the adjusted
brightness will automatically be registered for the
current preset position.
!3 PRESET (*2)
Select a preset position from the pull-down menu
and click the [GO] button. The camera will move to
the selected preset position (☞ page 36). "H" next to
the preset position number indicates the home posi-
tion. When "Home position" is selected, the camera
will move to the home position.
When the preset ID is registered for a preset posi-
tion, the registered preset ID will be displayed next
to the preset position number.
!4 Camera title
The camera title entered for "Camera title" on the
[Basic] tab will be displayed. (☞ page 19)
!5 Alarm occurrence indication button (*2)
This button will be displayed and will blink when an
alarm has occurred. When this button is clicked, the
alarm output terminal will be reset and this button
will disappear. (☞ page 47)
!6 Full screen button
Images will be displayed on a full screen. To return
to the "Live" page, press the [Esc] key or the [F5]
key, or the combination of the [Alt] key and the [F4]
key on the keyboard.
!7 One shot button
Click this button to take a picture (a still picture). The
picture will be displayed on a newly opened window.
When right-clicking on the displayed image, the pop-
up menu will be displayed. The displayed image can
be saved on the PC by selecting "Save" from the
pop-up menu.
!8 Mic input button (*3)
Turns on/off the audio reception (hear audio from
the camera on a PC). This button will be displayed
only when "Mic input" or "Interactive" is selected for
"Audio mode" on the setup menu. (☞ page 40)
When this button is clicked, the button will turn into
the button and audio from the camera will not be
heard.
Audio volume can be adjusted (Low/Middle/High) by
moving the volume cursor .