


15
2. Select Slideshow Setup, and then use to select Yes or No
under Display Current Time.
3. Select
Done.
TIP: If the time is incorrect, refer to Set Date and Time on page 27
to set the clock.
Display Photo File Date/Time Stamp with Photos
Most digital cameras typically include a Date/Time stamp when
saving photo files. If your photo files contain this Date/Time
information, you can have it displayed with your photos if desired.
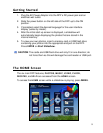
1. On the
HOME screen, press MENU to display the Setup Menu.
2. Select
Slideshow Setup, and then use to select Yes or No
under Display Photo Date/Time.
3. Select
Done.
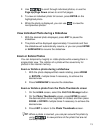
Import Photos into Internal Memory
You can import your photo files from external media sources (i.e.,
memory card, USB flash drive) into the DPF’s internal memory. The
number of photo files you can import depends on file size and
available memory.
TIP: After starting an import, you can press EXIT to cancel the
import operation.
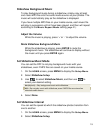
Import All Photos into Internal Memory
1. Insert your media source into the DPF. The memory card
option screen will be displayed.
2. Select
Import All Photos.
3. When import is complete, press
EXIT to return to the
previous screen.
Import Individual Photos into Internal Memory
1. Insert your media source into the DPF. The memory card
option screen will be displayed.
2. Select
Select Photos to Import.