Pelco Manual C540M (6/98) 13
5. Select the camera icon, .
6. The next screen gives you a choice for “Camera direct control type.” Change,
if necessary, the receiver/driver type listed as being attached to COM 1 and/or
COM 2 to the receiver/driver type you actually have connected to COM 1 and/
or COM 2 (usually this is Pelco).
7. Continue with the
key to enter the “Camera Assign” menu screen and
configure the parameters as required for up to 32 physical cameras connected
to COM port 1 (1-16) or COM port 2 (17-32). Use the functional key to
change or add Logical numbers and use the function icon (if receiver is
capable) to assign toggle or momentary attributes for applicable AUX num-
bers 1-8. Use the ESC key to back out of the AUX menu.
8. Save and return to the main “SETUP MODE” menu. Turn OFF DIP switch 2
first, then exit setup mode.
Serial Port Speeds
When it is necessary to adjust serial port speeds, do the following:
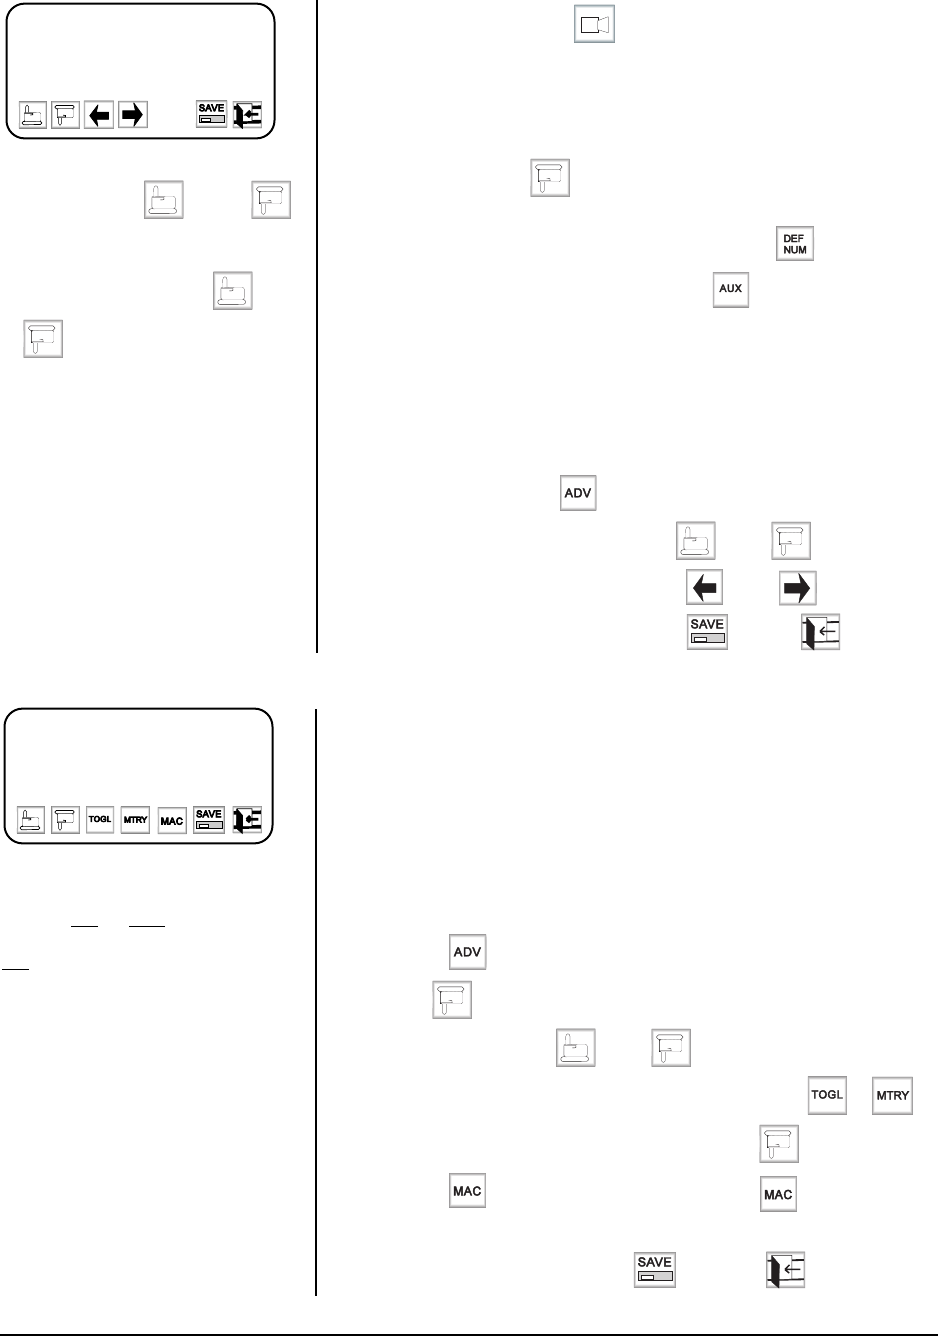
1. In
setup
mode, select to go to
Advance Setup 1.
2. Select the appropriate COM port using and/or .
3. Choose the appropriate baud rate using
and/or .
4. Having adjusted the baud rate(s), select and then .
3.2.8 Configuring the Relays
Each CM9760-KBD keyboard has two relays which can be used in conjunction with
macros stored in the connected system, which will typically be the CM9760-CC1.
Macros are used to automate sequences of events. A simple macro might present
the operator with a view from one camera for five second, then switch to another
camera for 10 seconds, and so on. More complex macros can automate lengthy
and repetitive procedures, thus optimizing the collective CCTV system.
While in setup mode, it is possible to assign a macro to a relay, and also modify the
way in which the relay is switched. The relays can be switched in two ways: either
toggle
or
momentary
.
To configure a relay:
1. Select
from the
setup mode
menu.
2. Use
to advance beyond COM 3, and enter
Advance Setup 2
3. Select the relay using and/or .
4. Define the relay action to be
toggle
or
momentary
using or .
5. Select
Mac
(which is shown below the relay) using .
6. Select , and enter the macro number. Select once again.
7. Repeat for second relay if desired.
8. Having defined the relays, select followed by .
NOTE:
When a relay is in toggle
mode, a single key press will switch
it either
ON or OFF. In momentary
mode, a relay will remain switched
ON only while the appropriate key is
held down.
> RELAY 1 TOGGLE
MAC 1 0
RELAY 2 TOGGLE
MAC 2 0
ADVANCE SETUP 2
NOTE:
Proceeding beyond COM 1
or COM 3 using
and/or
causes the operator to arrive at a new
setup page. It is possible to return to
Advance Setup 1 by using
and/
or
.
> HOST SYSTEM 9750
COM 1 4800 8E
COM 2 4800 8E
COM 3 4800 8E
ADVANCE SETUP 1


