English_13
●
INTRODUCTION
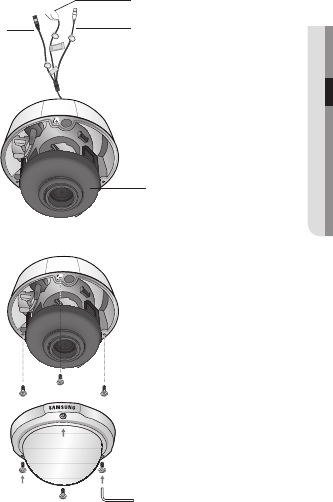
Connect power and video cables and arrange them through the hole you
want to pass when mounting the main body on the mounting bracket, note
that not to damage or squeeze the cables.
2.
Secure the camera on its mounting bracket with the three screws using L
Wrench(included) .
3.
Power input terminal
Video output jack
RED (MD_OUT
WHITE (EXT_DN)
BLACK (GND)
Function jack
The installation should be done by qualifi ed service personnel or system installers.
If the ceiling material is not strong enough to hold the installation screws, the camera may fall off.
Reinforce the ceiling as needed.
M
Cover-protective sponge
Remove the “Cover-protective sponge” from the lens before installing the camera.


