CONNECTIONS
Carefully read the documentation which is provided with each of the components being connected.
Be careful to connect components correctly, as incorrect connections could cause fire or other damage.
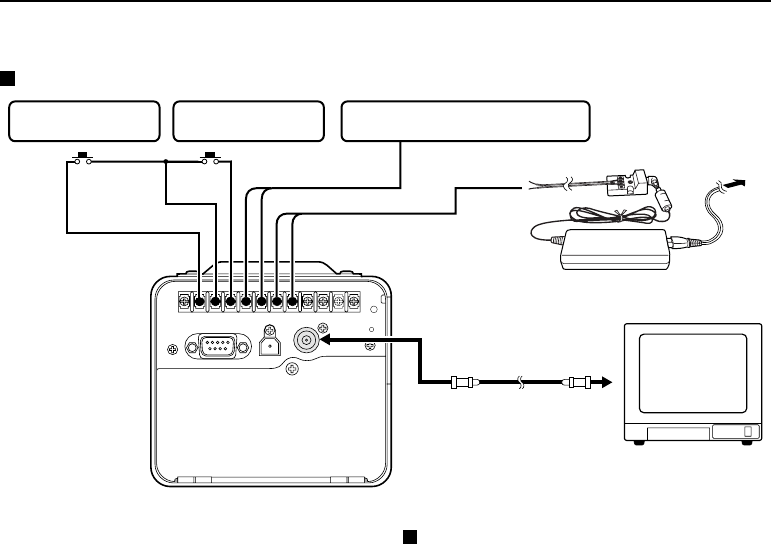
Basic connections
13.8 V DC
(A) Hold-up switch
Coaxial cable
To VIDEO IN
TV monitor
(sold separately)
1
2
3
(B) Suspicion switch
(C) Warning signal check output
(connect a lamp or similar device)
Connect all required devices to the control
terminals before turning on the power.
(A) Connect a commercially-available hold-up
switch (H/GND).
(B) Connect a commercially-available suspicion
switch (S/GND).
(C) Connect a commercially-available monitoring
lamp to the warning signal output terminal.
This will light or flash in the same way as the
warning indicator on the rear of the camera
for checking purposes.
Connecting the power supply
1 Connect a commercially-available cable to the
relay connector (supplied), and then connect
the cable to the power supply connector (13.8
V/GND) of the camera.
2 Insert the plug of the AC adaptor (supplied) into
the relay connector terminal.
3 Insert one end of the power cord (supplied) into
the AC adaptor, and insert the other end into a
wall outlet.
Note:
•
The cable that is connected to the relay
connector can be up to a maximum of 30
meters in length, but it should not be bound up
with any other cables.
•
Use UL NISPT-2 (2/18AWG, 105˚CM, VW-1)
cables which are listed in UL as the connection
cables.
L42A4/US (DSR-C100) GB 2001, 4, 16
English 13


