77
Digital Still Camera Features
SELECT
FORMAT
ALL DATA
BE
NO
YES
ERASED.
WILL
SET
Formatting a Card
Available mode:
Card Camera
Before using a commercially available card
with this camcorder, you must first have it
formatted. Also, if any of the following
warning indicators displays, you will need to
format your card.
• “FORMAT MEMORY CARD”
• “MEMORY CARD ERROR”
• “MEMORY CARD READ ERROR”
• “CANNOT STORE DATA”
Notes:
• Formatting a card erases all stored images,
including delete-protected images. Be sure
to backup important data on your computer
or other media before formatting the card
(see pages 86–88).
• Do not remove the power source during
formatting, as this may cause damage to the
camcorder or card. It is recommended that
you use the AC outlet for the power supply.
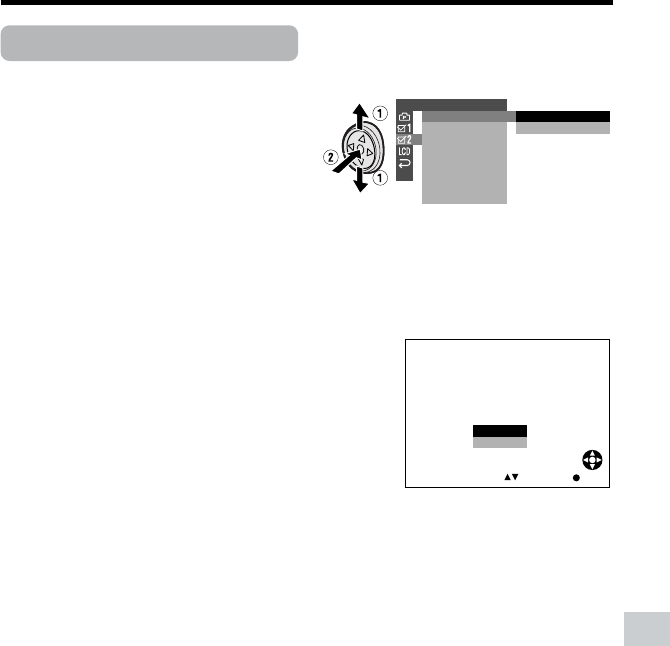
1 In Card Camera mode, press the
DISPLAY button until the mode
screen appears.
2 Select “MENU”, then “EXECUTE” by
using the Operation button (see page
32).
3 Press l or m to select ~, then
press the center of the Operation
button.
4 Press l or m to select “FORMAT”,
then press the center of the Operation
button.
5 Press l or m to select “EXECUTE”,
then press the center of the Operation
button.
• To cancel formatting, press l or m
to select “RETURN”, then press the
center of the Operation button.
6 Press l or m to select “YES”, then
press the center of the Operation
button to begin formatting.
• The menu screen displays when
formatting finishes.
7 Press the DISPLAY button to turn off
the menu screen.
Notes:
• The supplied card is preformatted for
immediate use.
• Use this camcorder to format a card. The
camcorder may not recognize the images
on a card formatted by a computer or other
equipment.
OTHERS 2
RETURN
EXECUTE
RETURN
FORMAT
SETTING
12H 24H/
