15
GB
Basic operations
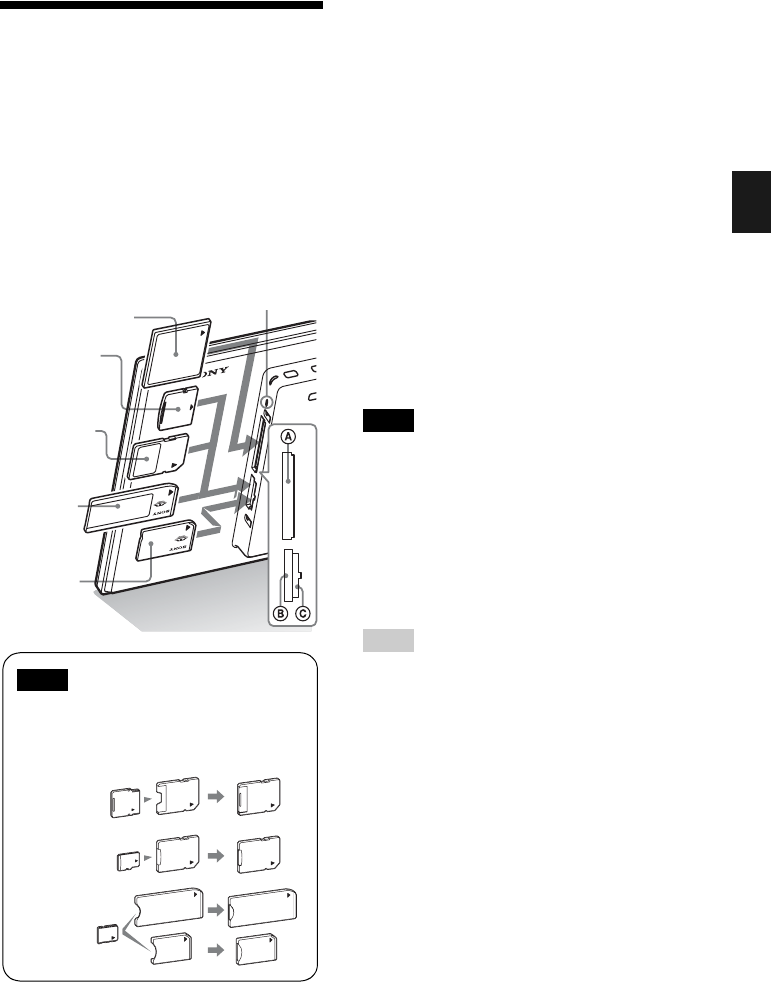
Inserting a memory card
Insert the memory card firmly into the
corresponding slot with its label side
facing toward you (when you are facing
the back side of the photo frame).
The access lamp flashes when the memory card
is inserted correctly. If the access lamp does not
flash, reinsert the memory card after checking
the label side of the memory card.
For details on compatible memory cards, see
pages 60 to 62. For supported file formats, refer
to the Operating Instructions, “Specifications”.
When you insert a memory card
When you insert a memory card, the images
stored on it are automatically displayed. If you
switch off the power while they are being
displayed and switch the power back on, the
same images continue to be displayed.
To change the playback device
Press SELECT DEVICE (page 32).
To remove a memory card
Remove the memory card from its slot in the
opposite direction from which it was inserted.
Do not remove the memory card while the
access lamp is flashing.
Notes
• The slot is both a “Memory Stick” standard and
Duo size compatible slot, so you do not need a
“Memory Stick” adaptor.
• The “Memory Stick” (Standard/Duo)/SD memory
card/MMC/xD-Picture Card multi-purpose slot
automatically detects the card type.
• Do not insert multiple memory cards into B and
C slots simultaneously. If multiple memory cards
are inserted, the photo frame will not work properly.
Tip
S-Frame fails to auto rotate if:
– An image file has been shot with a DSC which
doesn’t support Exif rotate tag recording.
– An image file is retouched and saved with
retouching software which breaks the Exif
rotate tag.
Access lamp
xD-Picture
Card
(Slot B)
SD memory
Card
(Slot B)
“Memory
Stick”
(Slot B)
“Memory
Stick Duo”
(Slot C)
CompactFlash
card
(Slot A)
(DPF-XR100 only)
Note
When using a miniSD/miniSDHC 1, microSD/
microSDHC 2 or “Memory Stick Micro”
media 3, be sure to insert it in an appropriate
adaptor.
1
2
3
