


GB
14 Installing the Unit
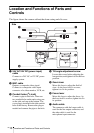
B Basic Installation and Connections
Installing the Unit
Using the supplied screws, you can attach
the camera to the ceiling or the wall.
• If you attach the unit to the ceiling or the
wall, entrust the installation to an
experienced contractor or installer.
• If you install the unit on the ceiling or the
wall, be sure the ceiling or the wall is
strong enough to withstand the weight of
the camera. If the ceiling or the wall is not
strong enough, the unit may fall and cause
serious injury.
• If you attach the unit to the ceiling or the
wall, check periodically, at least once year,
to ensure that the connection has not
loosened. If conditions warrant, make this
periodic check more frequently.
• Take care not to stain or strike on the lens
cover. Such acts may inhibit optimum
performance of the camera and may cause
a malfunction.
• After deciding the direction in which the
camera will shoot, make the required holes
for the connecting cables.
• The lens of the camera is protected by a
sheet for transport. Before installation,
remove the lens cover, then remove the
sheet.
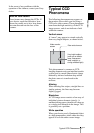
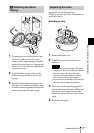
Mounting screws
The supplied stand is provided with four
ø 4.5 mm (
3
/16 inch) mounting holes. Install
the stand to a ceiling or wall with screws
through these holes.
The required mounting screws differ
depending on the installation location and its
material.
Steel wall or ceiling: Use M4 bolts (not
supplied) and nuts.
Wood wall or ceiling: Use the supplied M4
tapping screws. The panel thickness must be
15 mm (
5
/8 inch) or more.
Concrete wall: Use appropriate anchors,
bolts and plugs (not supplied) for concrete
walls.
Junction box: Use screws (not supplied) to
match the holes on the junction box.
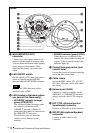
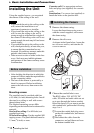
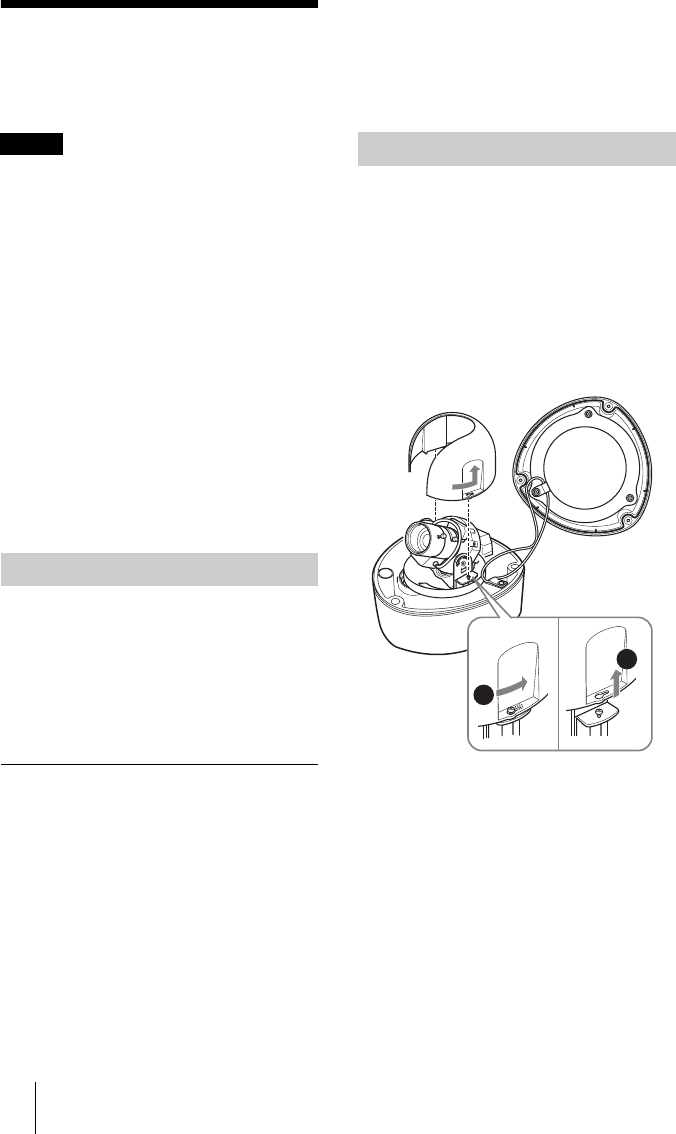
1 Remove the dome casing.
Loosen the three dome casing screws
with the wrench supplied, and remove
the dome casing.
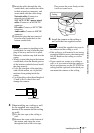
2 Remove the slit cover.
As shown in the figure below, loosen the
two slit cover screws, and turn the slit
cover to remove.
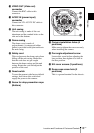
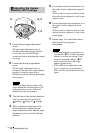
3 Choose the conduit hole to use.
The BNC cables, 24V AC/12V DC
cable, I/O cable and audio cable are set
up to pass through the bottom conduit
hole at the factory. If you want to use the
side conduit hole, perform the following
steps 1 to 4.
1Loosen the conduit hole plug screw
on the side conduit hole, and remove
the plug.
2Disconnect the cables from the
connectors, and pull them out from
the bottom conduit hole.
Notes
Before installation
1 Installing the Camera
1
2