


63
Transferring Images Manually
Transferring Images from my Camcorder to my Computer Manually: WINDOWS
1. Use the USB cable that came with your camcorder to connect your camcorder to your computer.
2. MSDC appears on the LCD.
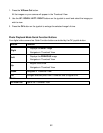
3. A window appears with a list of options, select “Open folder to view files” and click OK.
4. Open the DCIM folder and the folder inside to view the media files.
5. Select the media and copy the files from this folder into your computer. Optionally, select the
files and choose Copy from the Edit menu. Then select a folder and choose Paste from the Edit
menu.
6. We recommend that you copy the images into the Pictures/My Pictures folder and the videos
into the Videos/My Videos folder.
7. Do not disconnect the cable during transfer. Doing so will cancel the transfer of any files on their
way to your computer.
Transferring Images from my Camcorder to my Computer Manually: MACINTOSH
1. Use the USB cable that came with your camcorder to connect your camcorder to your computer.
2. MSDC appears on the LCD.
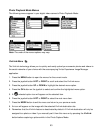
3. The camcorder‟s device icon appears on the desktop.
4. Click on the device icon and open the DCIM folder and the folder inside to view the media files.
5. Select the files and drag them into your computer. Optionally, select the files and choose Copy
from the Finder‟s Edit menu. Then select a folder and choose Paste from the Edit menu.
6. We recommend that you copy the images into the Pictures folder and the videos into the Movies
folder.
7. Do not disconnect the cable during transfer. Doing so will cancel the transfer of any files on their
way to your computer.
Camera Maintenance
The digital camera is a delicate device. Please handle your camera with care to avoid damaging it.
Do not expose your camera to heat sources.
Do not use you camera in wet or moist conditions.