


AVerMedia User’s Manual
EYES Pro/MP2016/MP3000/MP5000
43
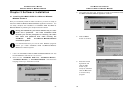
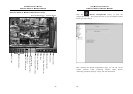
3. Enable
Check Enable to enable this camera for
monitoring. If a camera is not enabled, the
image from this camera will show as Figure
1 (gray scale) on the screen. This camera’s
sign in the menu will change to
.
If a camera input is not physically connected to a camera,
you need to de-select Enable, or the system will not reach
its best performance.
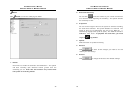
4. Camera
Display:
Check Display to display the image from
this camera on the screen. If you check
Enable without checking Display, the
image from this camera will show as
Figure 2 (color) on the screen. Although
the image is not shown on the screen, this
camera is still performing Record When
Motion Detected, Record When Start
Monitoring, or Don’t Record,
depending on which one you chose in the
Monitoring section of the System
Configuration.
Name:
In the Name field, you can set the name for the camera.
Comment:
This field allows you to add any remarks you have for this camera.
Any comment left can serve as a reminder for system manager.
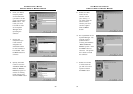
Image Properties:
You may set the following properties for the image of this camera.
brightness contrast color saturation
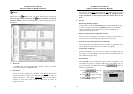
Figure 1.
Gray-scale image
Figure 2.
Color ima
g
e
AVerMedia User’s Manual
EYES Pro/MP2016/MP3000/MP5000
44
Settings for the image properties are configured for the designated
card, which may also connect to other cameras. That means, the
settings you make for this camera will apply to other cameras that
connect to the same card.
The adjustment of image properties will result in
inefficiency as the video format is set to be PAL for the
unsupported hardware temporarily
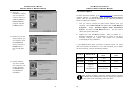
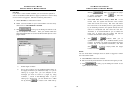
5. PTZ Camera
PTZ Camera Setup
A. Select a Com Port where PTZ camera connector connected and
the PTZ Model you use (refer to your PTZ camera spec.) by the
pull-down lists. And click Set to place your setting.
B. To control PTZ camera with server’s camera by entering PTZ
Camera ID at the range of 2~225.
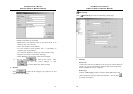
Preset Position Setup
A. Choose a position number by the pull-down list to set the
monitoring position with the right side direction interface.
Meanwhile the display you adjust will be shown on the upside.
B. Determine a Position Name for the position.
C. During AutoPan, Dwell determines the time for the camera to
stay (1~60 seconds) at one position before rotating to the next
position.
D. You can set the Speed (5~255 deg/s) with which the camera
rotates from its current position to the next preset position.
E. Click Set to involve into the setting.
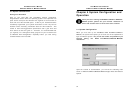
6. Update
Click this button to update the setting.
7. Restore
Click this button to abort all the changes you made so far and
restore your last settings.
8. Default
Click this button to change all values to their default settings.