AVerMedia User’s Manual
EYES Pro/MP2016/MP3000/MP5000
73
1. First define the name of e-map.
2. Configure e-map
Import
If an image of map (bmp./jpg. formats are supported) has existed,
click Import button to input the image which will be shown on the
right side screen.
Edit
If you don’t have an image of map in hand or need to modify the
image, click Edit button to bring out the bmp. or jpg. programs to
create an one or revise it.
3. Arrange Cameras, Sensors, and Relays
To add a new event, drag the button of Camera, Sensor, or Relay in
the left side field and drop in the desired position of the map. The
buttons not be set up will be disabled. To delete, drag and drop it in
any positions out of the map. Whichever camera you click on, the
monitoring status of which will be displayed in the left bottom field.
4. Information
Put in some information for each event to be reference during
operation. Each edit box is limited in 32 bytes.
5. Click Update button to save your current setup.
6. Click Restore button to recover the previous setup.
7. Click Default button to change the setup to default settings.
AVerMedia User’s Manual
EYES Pro/MP2016/MP3000/MP5000
74
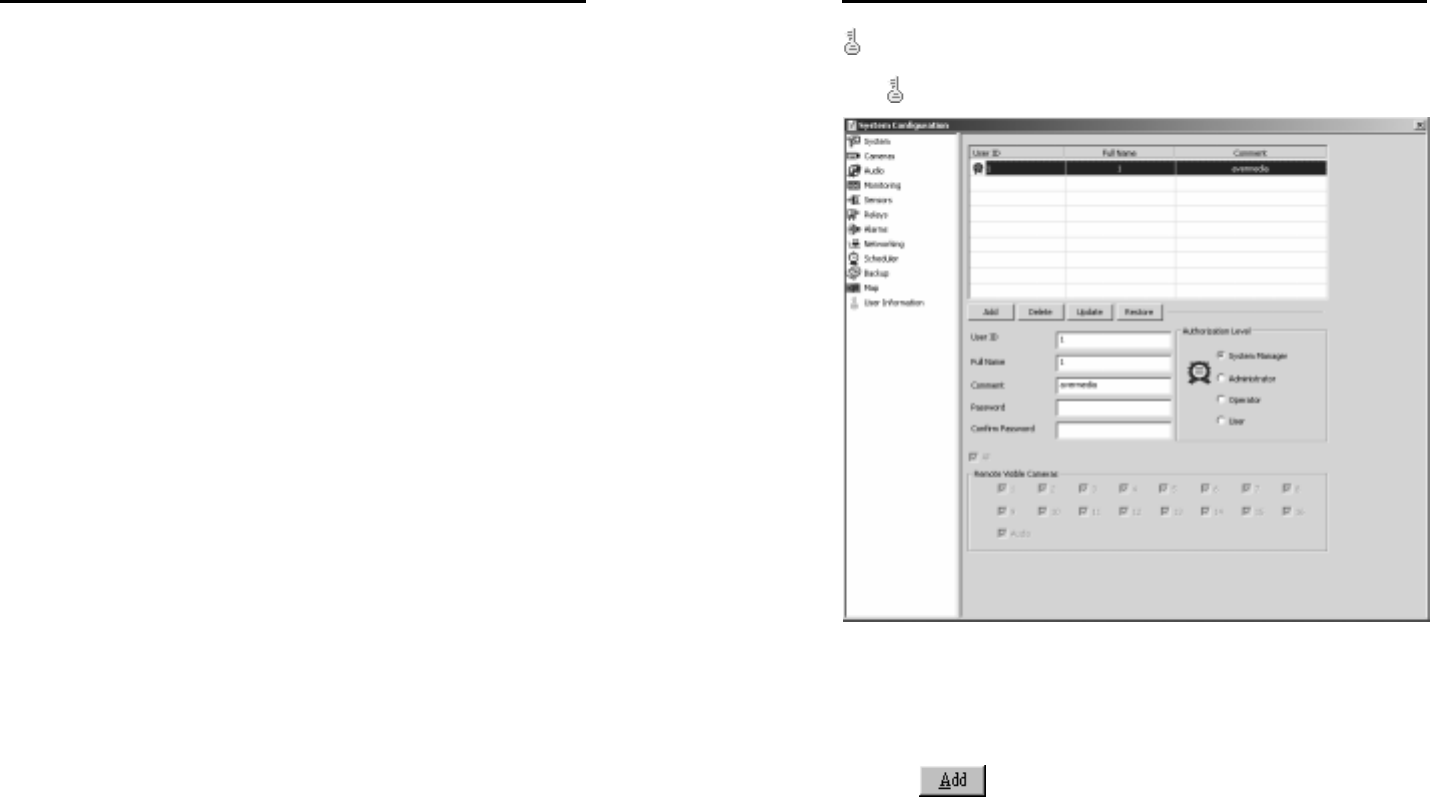
Users Information
Click to enter the setup page for user information.
1. Add New Users
To add a new user, first fill the User ID, Full Name, Comment,
Password, Confirm Password, and Authorization Level
(System Manager, Administrator, Operator and User) fields. Next
select the cameras that can be remotely viewed by this user and
click
.
2. Remote Visible Camera section
You need to select which cameras and whether the audio files are
accessible remotely for the user you are going to add. You can
check All Cameras to select all, including the audio.


