


Photos
72
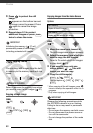
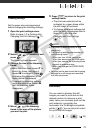
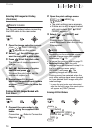
3 In the print settings menu, select
(, ) the setting you want to
change and press .
4 Select ( ) the desired setting
option and press .
5 Select ( , ) [PRINT] and
press .
•Printing starts. The print settings
menu disappears when the
printing is completed.
• To continue printing, select ( )
another still image.
1 Press while printing.
2 Select ( ) [OK] and press .
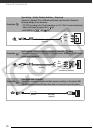
Disconnect the cable from the camcorder
and printer and turn off the camcorder.
If an error occurs while printing, an error
message, for example [NO PAPER], will
appear on the camcorder. Solve the
problem referring to the error message list
( 106) and to the printer's instruction
manual.
•
Canon's PictBridge-compatible printers:
If
printing does not resume automatically
after you solved the problem, select
[CONTINUE] and press to resume
printing. If that option is not available,
select [STOP] and press and then
restart printing from the beginning.
• Other printers or if the error still persists with
a Canon printer: If printing does not
resume automatically, disconnect the
USB cable and turn off the camcorder.
After a short while, turn on the
camcorder and restore the USB
connection.
IMPORTANT
• You may not be able to print correctly
with a PictBridge-compatible printer still
images whose file names have been
changed or that were recorded, created,
edited or changed with any device other
than this camcorder.
• If [BUSY] does not disappear,
disconnect the USB cable and restore
the connection after a short while.
TO CANCEL THE PRINTING
WHEN YOU HAVE FINISHED PRINTING
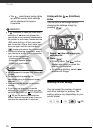
Current paper settings (paper size, paper
type and page layout)
Trimming settings ( 73)
Date printing
Print effect
Number of copies
Paper settings
PRINT ERRORS
COPY