


3-31
Cisco Video Surveillance 2500 Series IP Camera User Guide
OL-19273-02
Chapter 3 Configuring and Managing the IP Camera
Applications Windows
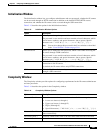
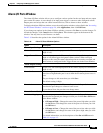
If you change any options in the Motion Detection window, you must click Apply to save the changes.
Note In addition to moving objects, motion detection can be triggered by rapid changes in lighting conditions
or by movement of the IP camera itself.
Table 3-16 describes the options in the Motion Detection window.
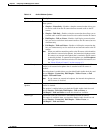
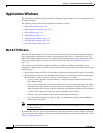
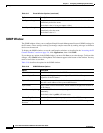
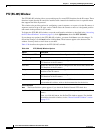
Event Window
The Event window provides options for configuring how the IP camera handles events. An event is either
of the following:
• Motion that the IP camera detects. For related information about motion detection, see the “Motion
Detection Window” section on page 3-30.
• A change of state from low to high or from high to low on an input port of the IP camera. For related
information about input ports, see the
“Alarm I/O Ports Window” section on page 3-35.
When an event occurs, it triggers the IP camera to take certain configured actions. For example, an event
can cause the IP camera to send a notification e-mail message to designated recipients and upload a video
file to an SMTP server or an FTP server, or it can cause the IP camera to activate an output port.
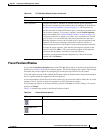
The Event window allows you to designate up to 10 schedules. If an event takes place within a designated
schedule, the IP camera takes the actions that you configure.
To display the Event window, access the configuration windows as described in the “Accessing the IP
Camera Windows” section on page 2-6, click Applications, then click Event.
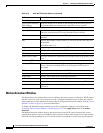
If you change any options in the Event window, except deleting an event from the event schedule list,
you must click Save to save the changes. To discard the changes, click Cancel before clicking Save.
These buttons appear at the bottom of the window. You may need to scroll down to see them.
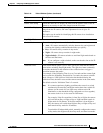
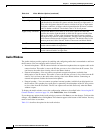
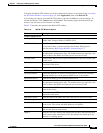
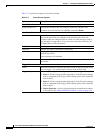
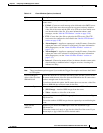
Ta b l e 3-16 Motion Detection Window Options
Option Description
Setting Custom Area Check this check box to cause the IP camera to examine up to 4 areas in its
video field for activity. Then configure these options:
• Window check boxes—Check up to 4 check boxes to specify up to 4
areas in the IP camera video field. If desired, enter a name of up to 12
characters for each area in the field next to the corresponding check box.
When you check a check box, a window appears in the IP camera view.
This window designates the area to examine for motion. Drag the
window to the desired area, and drag an edge or corner of the window to
resize it.
To remove a window, uncheck its check box.
• Indicator—Display only. Horizontal bar that represents how much
activity is being detected in the area. You can test the sensitivity setting
by causing motion the area and looking at this indicator.
• Sensitivity—Drag the slider to specify the relative amount of activity in
the area that causes an event alert. A lower value means that more
activity is required to trigger an alert. A higher value means that less
activity is required.