Using the Document Camera
23
Adjusting the Brightness
The document camera is initially set to auto iris. You can manually
adjust the iris to control the amount of light that reaches the camera.
If the screen looks dark, press the
Open
button on the remote control
to open the iris so that more light reaches the camera. If the screen
looks too bright, press the
Close
button. To return to the auto iris
default setting, press the
Auto Iris
button.
Adjusting the White Balance
In different lighting conditions it may be necessary to adjust the
document camera’s white balance. This setting automatically corrects
for color shifts in different lighting environments.
If the displayed image has a color cast, press the
AWB
button on the
remote control to automatically adjust the white balance. See page 24
for manual white balance adjustments using the document camera’s
on-screen display.
Using the Pointer
The pointer lets you direct attention to specific sections of your
presentation material. You can choose from two types of pointers in
four colors.
To make the pointer appear on the screen, press the
Pointer
button
on the remote control. When the mouse is connected to the document
camera, pressing the left mouse button will also display the cursor.
To move the pointer, use the direction buttons on the remote control.
The mouse also allows you to move the pointer as you would on a
computer.
To remove the pointer from the screen, press the
Pointer
button on
the remote control or click the left mouse button three times (this
brings up an on-screen display before the pointer is removed).
For information on selecting different types of pointers, see page 24.
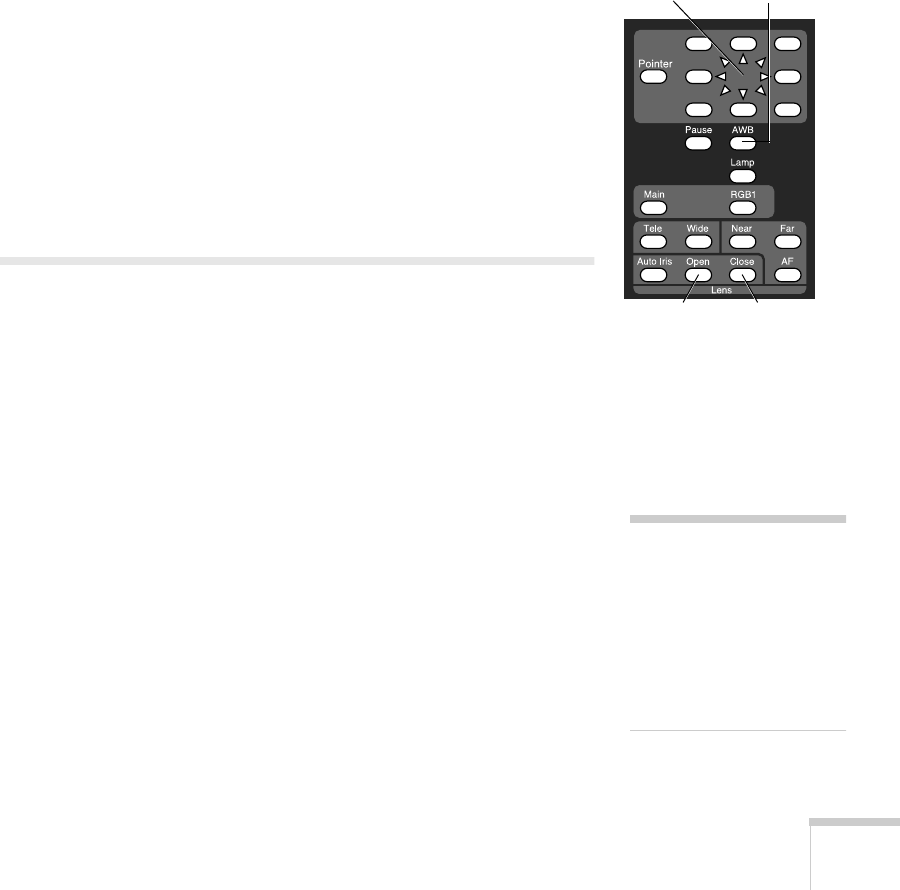
Remote control
direction
buttons
increase
brightness
reduce
brightness
correct
color cast
note
The pointer feature only
works when the document
camera is in the Main
display mode. It does not
work then the document
camera is in the RGB1
display mode.
elpdc04.book Page 23 Tuesday, February 12, 2002 8:32 AM


