


4
61
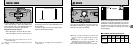
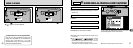
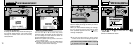
➀
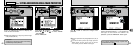
Press “d” or “c” to select “
E
RESIZE”.
➁
Use the “a()” and “b()” buttons to
select the desired image size.
➂
Press the “MENU/OK” button.
●
!
You can only select sizes that are valid for this
operation.
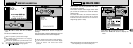
●
!
Resizing will not proceed if the “:” or
“” message is displayed. If this
occurs, erase some unwanted images or use a
SmartMedia that is not protected.
PROTECTED CARD
●
!
If you do not want to resize the image, press the
“BACK” button to return to the menu. To exit the
menu screen, press the “BACK” button again.
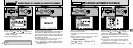
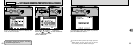
A confirmation screen appears. To proceed,
press the “MENU/OK” button. The resized image
is recorded as a separate file.
2 3
●
➀
●
➂
●
➁
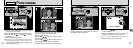
60
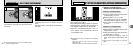
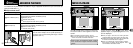
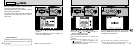
When you resize an image, a new file is created
containing a smaller amount of data.
Only still images with a size of 2400 × 1800 or
1280 × 960 can be resized.
The resize menu option cannot be selected for
images with a size other than 2400 × 1800 or
1280 × 960 .
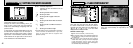
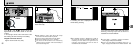
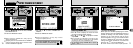
1
➀
Press “d” or “c” to select the image to be
resized.
➁
Press the “MENU/OK” button to display the
menu on the LCD monitor.
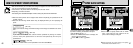
◆Why Resize?◆
Resizing is extremely convenient when you
want to attach an image file to an E-mail
message.
1
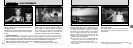
●
!
Movie files cannot be resized.
●
➀
●
➁
E
RESIZE
PLAYBACK MENU