


35
Advanced
Features
34
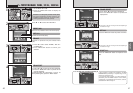
e MACRO
(
CLOSE-UP
)
PHOTOGRAPHY, d FLASH
STILL IMAGE MODE
e MACRO
(
CLOSE-UP
)
PHOTOGRAPHY
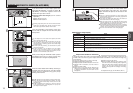
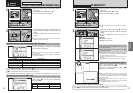
Selecting Macro mode allows you to take close-up
shots.
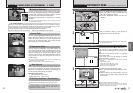
1Set the Mode dial to “q”.
2Press the “e” Macro button. The “e” appears
on the LCD monitor indicating that you can take
close-up shots.
To cancel Macro mode, press the “e” Macro
button again.
h Focus distance
Approx. 10 cm to 80 cm (3.9 in to 31.5 in.)
h Effective flash range
Approx. 30 cm to 80 cm (11.8 in. to 31.5 in.)
●
!
Macro photography is automatically cancelled in the following
situations:
i When you set the mode dial to a different mode (excluding
w)
i
When you switch to “a” or “s” modes
i When the camera is switched off
●
!
Select the appropriate Flash mode for the conditions.
●
!
If you are shooting in a dark location (when the “|” camera
shake warning icon is displayed), use a tripod to prevent
camera shake.
●
!
The lens is fixed at the wide-angle zoom setting and only the
digital zoom can be used.
●
!
The LCD monitor is automatically switched ON and cannot be
switched OFF.
●
!
When you cancel Macro mode, the LCD monitor remains on.
01
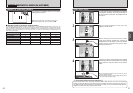
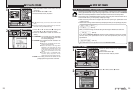
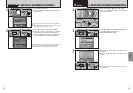
d FLASH
You can choose from 6 flash modes according to
the type of shot.
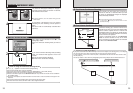
1Set the Mode dial to “q” or “?”.
2The flash setting changes each time you press
the “d” Flash button. The last flash mode
displayed is selected.
h Effective flash range (for
a AUTO)
Wide-angle: Approx. 0.3 m to 5.0 m
(1.0 ft. to 16.4 ft.)
Telephoto: Approx. 0.3 m to 4.0 m
(1.0 ft. to 13.1 ft.)
●
!
If you use the flash in very dusty conditions or when it is
snowing, white dots may appear in the image due to the flash
reflecting off the dust particles or snowflakes. Try taking the
shot using Suppressed Flash mode.
●
!
The flash charging time may increase if the charge remaining
in the battery is low.
●
!
When you take a shot using the flash, you may see the video
image disappear and the screen go dark as the flash charges.
At the same time, the viewfinder lamp blinks orange.
●
!
Some restrictions apply to the available flash modes
depending on the SP menu setting (
m, ,, . or /) (➡P.34).
01
02
02
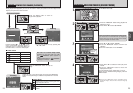
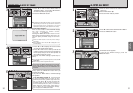
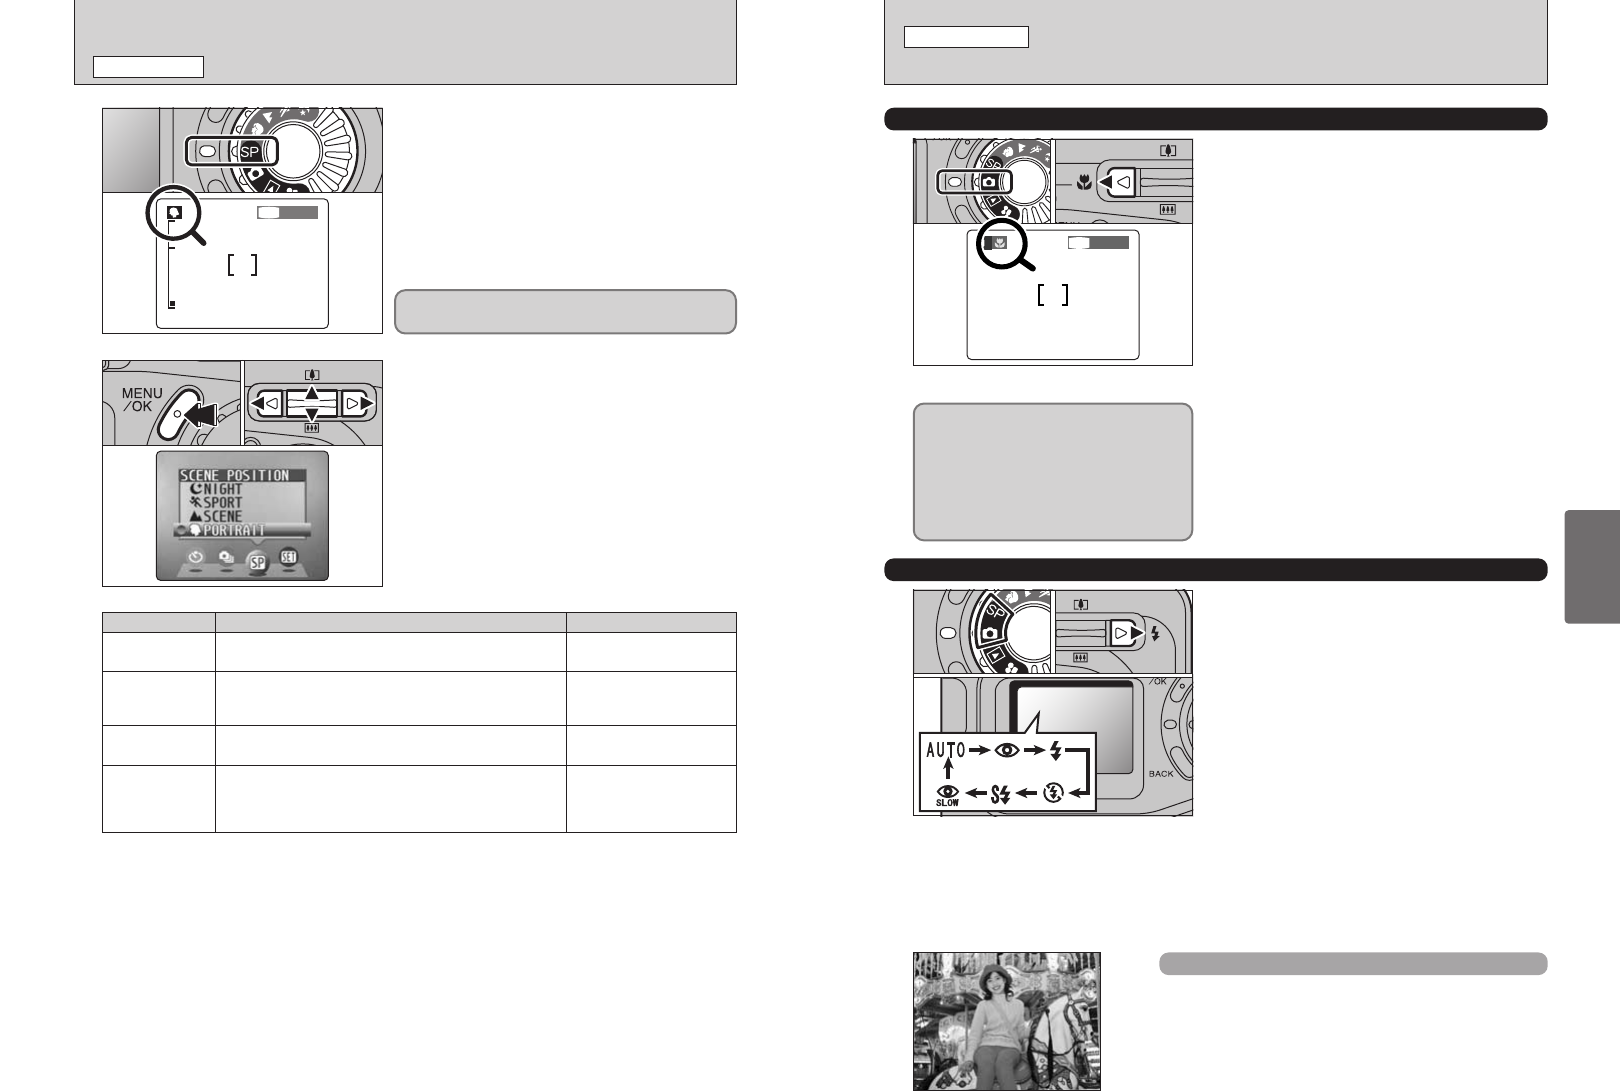
If you use the viewfinder to take a picture
in Macro mode, the field visible through
the viewfinder does not match the field
actually photographed because the
viewfinder and lens are in different
positions. Accordingly, you should use
the LCD monitor to take pictures in
Macro mode.
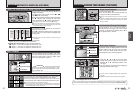
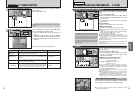
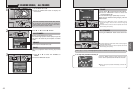
? SCENE POSITION
SCENE POSITION
This mode provides options tailored to different
types of scene.
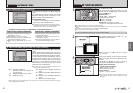
Set the Mode dial to “?”.
1
You can choose from 4 types of scene (m, ,, .
and /) displayed on the LCD monitor.
1Press the “MENU/OK” button to display the
menu.
2Press “d” or “c” to select “?” Scene Position
and then press “a” or “b” to change the setting.
3Press the “MENU/OK” button to confirm the
selection.
●
!
You cannot use the Mode dial to select m, ,, .or /.
2
01 0203
Macro mode cannot be used with any of the ?
modes.
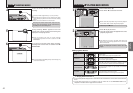
Explanation Available flash modes
m
Portrait
This is the best mode for shooting portraits. Skin tones are
shown beautifully and the overall tone is soft.
AUTO, b, d, v, c
,
Landscape
This is the best mode for shooting scenery in daylight and
provides crisp, clear shots of scenery such as buildings and
mountains.
can not be used
.
Sports
This is the best mode for shooting sporting events. This mode
gives priority to faster shutter speeds.
AUTO, d, v
/
Night Scene
This is the best mode for evening and night scenes. This mode
allows you to take shots where priority is given to slow shutter
speeds of up to 2 seconds. To prevent camera shake, always
use a tripod. To prevent camera shake, always use a tripod.
c, n, v
Auto Flash Mode
(
no icon
)
Use this mode for ordinary photography. The flash fires
automatically as required by the shooting conditions.
●
!
If you press the shutter button while the flash is charging, the shot will
be taken without the flash.