


68 hp photosmart 630 series user’s manual
NOTE If your computer is running Windows XP, when you
turn on the camera in the next step, a dialog box may
display that requests you to Select the program to
launch for this action. Simply click on Cancel to close
this dialog box.
4 Turn on the camera. The HP Image Unload software will
launch on your computer. If you have set the software to
automatically unload the images in the camera, the images
will automatically unload to the computer. Otherwise, in the
Welcome screen, click Start Unload.
Also, if there were any images in the camera that were
tagged in the Share menu for HP Instant Share destinations
(see Chapter 4: Using hp instant share on page 58), those
images will be sent to their respective destinations after the
images have been unloaded to the computer.
5 When the unload screen on the computer says Finished,
your images have been saved and shared. You can now
disconnect the camera from the computer.
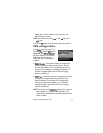
NOTE To unload images to a computer that does not have the
HP Photo & Imaging software installed on it, change the
USB Configuration setting to Disk Drive in the Setup menu.
(See Chapter 6: Using the setup menu on page 71, and
then see USB configuration on page 73.) The Disk Drive
setting allows the computer to recognize the camera as
another disk drive on the computer so that you can easily
copy the image files from the camera to the hard drive of
your computer.
However, if you want to use the Disk Drive setting on
your camera to unload images to a computer that is
running Windows 98, you must first install the HP Photo &
Imaging software on the computer.