


Customer Support: http://www.pandigital.net/kodaksupport 9
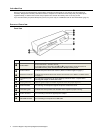
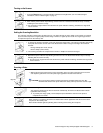
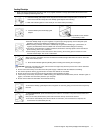
Turning on the Scanner
1. Press the
Power button. The power indicator and Status/Card lights blink. (For more indicator lights
information, refer to “Indicator Lights” on page 5.)
2. Wait until the power indicator stops blinking and then turns off. The Status/Card indicator stays on steady,
indicating that the scanner is ready.
Do not insert an original into the feed slot when the power indicator is blinking. Otherwise the original will
not be scanned.
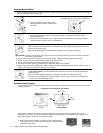
Setting the Scanning Resolution
The scanning resolution is measured in dpi (dots per inch). The higher the dpi, the more details on the original are captured
by the scanner and produce a higher quality scanned image. However, a higher dpi also results in a larger image size and
occupies more space on the memory card.
1. To change the scanning resolution, press and release the Power button. The scanning resolution changes by
each press of the button, and the color of the Status/Card indicator changes according to the resolution
selected:
Orange: 600dpi (fine mode, default)
Green: 300dpi (normal mode)
The scanning resolution for transparencies is fixed as 1200dpi and cannot be changed.
2. Wait until the power indicator stops blinking and then turns off. The Status/Card indicator stays on steady,
indicating that the scanner is ready.
Do not insert an original into the feed slot when the power indicator is blinking. Otherwise the original will
not be scanned.
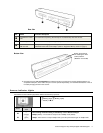
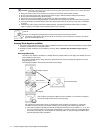
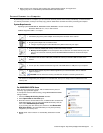
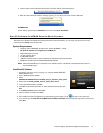
Scanning a Photo
1. With the photo facing upward and in correct orientation, place one edge of the photo on the scanner
and adjust the guide lever so that the photo aligns against the left side of the feed slot.
2. Insert the original level and flat into the feed slot.
The original is fed through the slot and scanned automatically; the Power and Status/Card indicator
lights blink while scanning.
To prevent poor image quality, reserve adequate space behind the scanner for the photo to
complete the scan feeds.
When scanning is completed, the Power and Status/Card indicator lights blink while the scanner stores
the photo on the memory card.
Wait until the indicator lights stop blinking before inserting and scanning the next photo.
CAUTION: Do not scan glossy photos in humid environments (humidity higher than 70% RH).
Otherwise the surface of the photo will become sticky and may cause the scanner to jam.
align lef
t