81
Connecting to a Computer
Connecting to a Computer, Printer, or TV
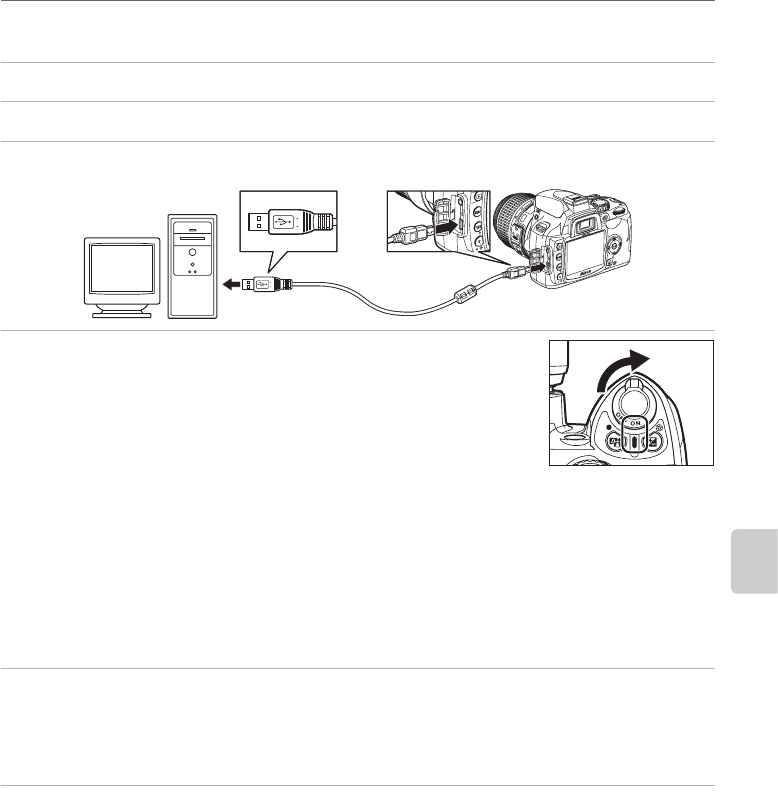
Connecting the USB Cable
1 Start the computer to which Nikon Transfer has been installed.
2 Turn the camera off.
3 Connect the camera to the computer using the supplied USB cable.
4 Turn the camera on.
Windows Vista
When the AutoPlay dialog is displayed, select Copy pictures to a
folder on my computer using Nikon Transfer. Nikon Transfer will
start. To bypass this dialog in the future, check Always do this for
this device:.
Windows XP
When the AutoPlay dialog is displayed, select Nikon Transfer Copy pictures to a folder on
my computer and click OK. Nikon Transfer will start. To bypass this dialog in the future, check
Always use this program for this action.
Mac OS X
Nikon Transfer will start automatically if Yes was selected in the Auto-Launch setting dialog
when Nikon Transfer was first installed.
5 Transfer photographs using Nikon Transfer.
For more information on using Nikon Transfer, refer to help information contained in Nikon
Transfer.
When transfer is complete, ViewNX will start automatically.
6 Turn the camera off and disconnect the USB cable when transfer is complete.
B Connecting the USB Cable
• Be sure that the connectors are oriented correctly, and do not use force, to connect the USB cable.
When disconnecting the USB cable, do not pull the connector at an angle.
• Connection may not be recognized when the camera is connected to a computer via a USB hub.
B During Transfer
Do not turn the camera off or disconnect the USB cable while transfer is in progress.
C Viewing Online Help
To view online help for Nikon Transfer or ViewNX, select Nikon Transfer help, or ViewNX help,
from the application’s Help menu.
