


Shooting
49
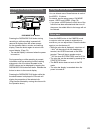
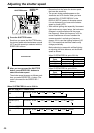
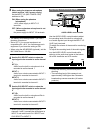
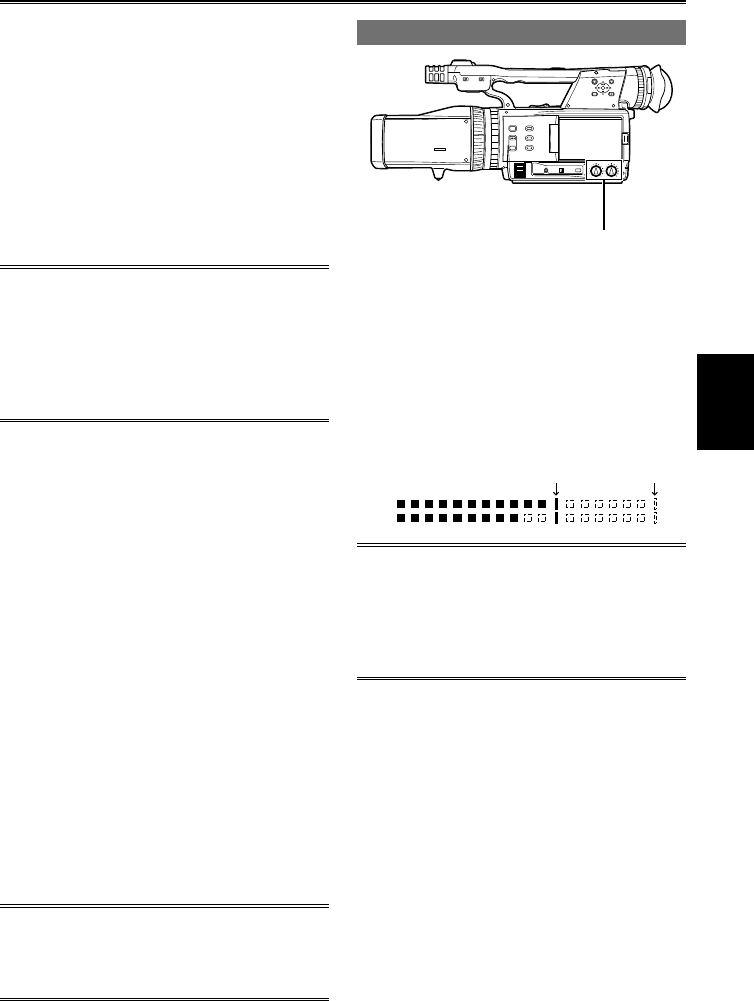
Adjusting the recording level
AUDIO LEVEL control knobs
PUSH
Use the AUDIO LEVEL control knobs to adjust
the recording level of the built-in microphone
or of audio signals input through the INPUT 1/2
(XLR 3-pin) terminals.
(To adjust the volume of the sound for monitoring:
Page 44)
To adjust the recording level of the audio signals,
turn the AUDIO LEVEL control knobs while
referring to the audio level meter at the bottom
left of the viewfinder and LCD monitor.
-12dB 0dB
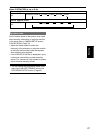
Check the recording volume level prior to
shooting.
The recording level of this camera is set
approximately 8 dB higher than Panasonic
broadcasting camera recorders (AJ series
products).
•
•
3
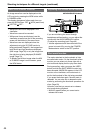
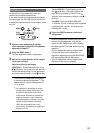
When using the phantom microphone
(which requires + 48 V power supply),
set the INPUT 1/2 (MIC POWER +48V)
switches to ON.
ON: (When using the phantom
microphone)
+48 V power supply to INPUT 1/2
terminals.
OFF: (When a phantom microphone is not
connected)
No power supply for INPUT 1/2 terminals.
The battery will discharge faster if you use a
phantom microphone.
Set to OFF if you connect equipment not
compatible with +48 V. You can damage such
equipment if you leave the setting at ON.
When using the AG-MC200G (optional), set the
MIC GAIN item to –50 dBu.
•
•
•
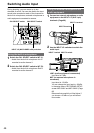
4
Use the CH1 SELECT switch to select the
input signal to be recorded to audio channel
1.
INT (L):
Audio from the built-in microphone Lch is
recorded to audio channel 1.
INPUT 1:
Audio from a device connected to INPUT 1
terminal is recorded to channel 1.
INPUT 2:
Audio from a device connected to INPUT 2
terminal is recorded to channel 1.
5
Use the CH2 SELECT switch to select the
input signal to be recorded to audio channel
2.
INT (R):
Audio from the built-in microphone Rch is
recorded to audio channel 2.
INPUT 2:
Audio from a device connected to INPUT 2
terminal is recorded to channel 2.
When inputting the microphone signal to
channels 1 and 2, connect the microphone to
INPUT 2 and switch both CH1 SELECT and
CH2 SELECT to INPUT 2.
•