


- 198 -
Connecting to other equipment
1
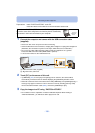
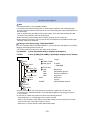
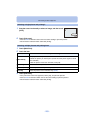
Connect the computer and camera with the USB connection cable
(supplied).
• Please turn this unit on and your PC before connecting.
• Check the directions of the connectors, and plug them straight in or unplug them straight out.
(Otherwise, the connectors may bend out of shape, which will cause a malfunction.)
• Do not use any other USB connection cables except the supplied one or a genuine
Panasonic USB connection cable (DMW-USBC1: optional).
• Turn the LCD monitor so the LCD will show out.
A USB connection cable (supplied)
B Align the marks, and insert.
2
Touch [PC] on the screen of this unit.
• If [USB Mode] (P73) is set to [PC] in the [Setup] menu in advance, the camera will be
automatically connected to the PC without displaying the [USB Mode] selection screen.
• When the camera has been connected to the PC with [USB Mode] set to [PictBridge(PTP)], a
message may appear on the PC’s screen. Close the screen by selecting [Cancel], safely
remove the USB connection cable (P200), and set the [USB Mode] to [PC].
3
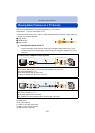
Copy the images to a PC using “PHOTOfunSTUDIO”.
• Do not delete or move copied files or folders in Windows Explorer. When viewing in
“PHOTOfunSTUDIO”, you will not be able to play back or edit.
Preparations: Install “PHOTOfunSTUDIO” to the PC.
•
Read the “Basic Owner’s Manual” for more information about install.
The software “PHOTOfunSTUDIO” on the CD-ROM (supplied) can
be used to save all the still pictures and motion pictures recorded by
the camera in their various formats to your computer.