9 C2963M-C (8/10)
Getting Started
Before installing your network dome, thoroughly familiarize yourself with the information in this section of the manual.
NOTES:
• Pelco recommends connecting the dome to a network that uses a Dynamic Host Configuration Protocol (DHCP) server to address devices.
• Do not use a network hub when configuring the network settings for the dome.
• To ensure secure access to the network dome, place the dome behind a firewall when it is connected to a network.
PARTS LIST
Remove all of the contents from the shipping box.
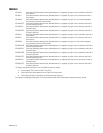
Installation tools and the following parts are needed but not supplied:
Qty Description
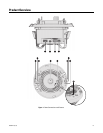
1 Back box with camera module
1 Surface mount
1 Lower dome (includes trim ring and bubble)
1 Dome liner
1 4-pin connector
1 2-pin connector
1 Quick Start Guide
1 Resource disc
3 MAC address labels (extra)
Qty Description
1 Lens (use either a megapixel or standard auto iris lens, depending on the camera model)
1 Service cable (IX-SC)
1 Mounting hardware


