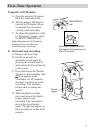
49
Playback
Playback Options
The camcorder’s playback features
include displaying still images, high-
speed shuttle search, and frame-by-
frame playback. In this section, you
will also learn how to connect your
camcorder to a TV, VCR, or computer.
Playback features (PLAY, PAUSE,
FORWARD, REVERSE, STOP) can
be handled using the camcorder’s
buttons.
This camcorder can also be controlled
by most RCA, GE, or PROSCAN
universal remote controls using the
VCR2 button. Such remotes without a
VCR2 button should be able to be
programmed to control the camcorder
using the AUX button. See the manual
that accompanied the universal
remote for details on programming it).
Note: See the Accessories section for
more information about ordering an
optional remote control.
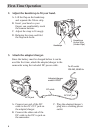
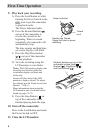
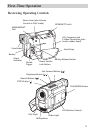
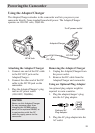
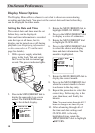
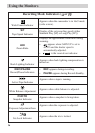
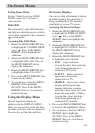
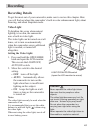
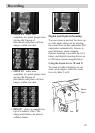
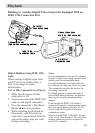
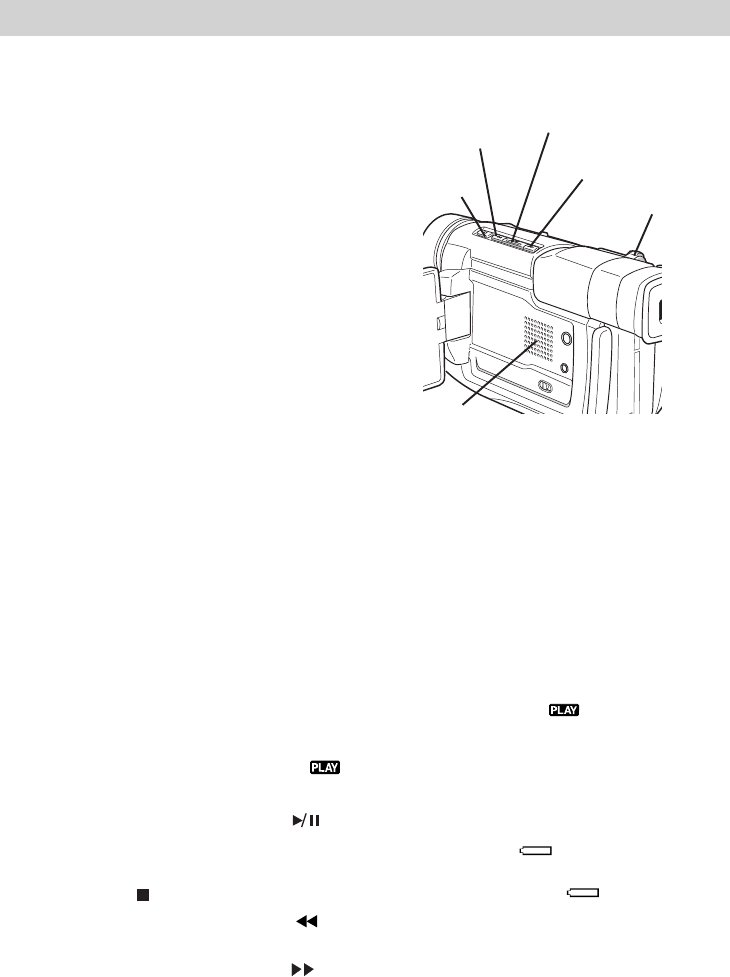
Basic Playback
1. Insert a Mini DV cassette.
2. Press in the Lock Button and rotate
the Power Switch to playback (
)
mode.
3. Press the Play-Pause Button (
) to
start playback.
• To stop playback, press the Stop
Button (
).
• Press the Rewind Button (
) to
reverse playback direction, or
the Fast Forward Button (
) to
advance the tape while in stop
mode.
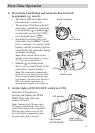
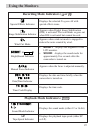
Controlling Speaker Volume
Slide the Power Zoom Lever (VOL.)
towards + to turn up the volume, or
towards – to turn down the volume.
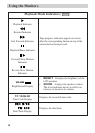
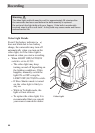
Notes:
If stop mode continues for five minutes
when power is supplied from a battery,
the camcorder shuts off automatically to
conserve power. To turn the camcorder on
again, set the Power Switch to OFF, then
to back to playback ( ) mode.
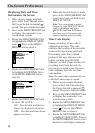
The playback picture can be viewed in the
LCD monitor, viewfinder or on a
connected TV.
LCD monitor/viewfinder indications:
• When power is supplied from a
battery the icon is displayed.
When power is supplied through
the DC cord, the icon does not
appear.
• When a tape is stopped, no
indicators are displayed.
When a cable is connected to the Audio/
Video jacks, no sound is heard from the
speaker.
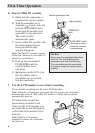
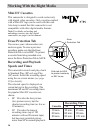
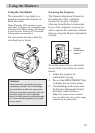
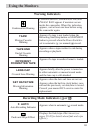
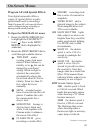
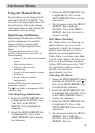
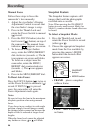
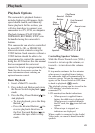
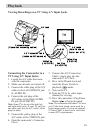
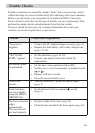
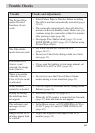
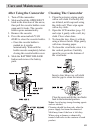
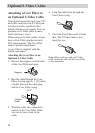
Playback
Rewind
Button
Play/Pause
Button
Fast-Forward
Button
Stop
Button
Zoom Lever
Speaker