


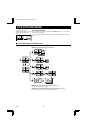
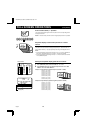
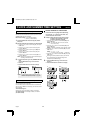
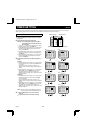
CLOCK AND SUMMER TIME SETTING Menu 2
(CLOCK SET)
The default setting is as indicated below. The clock will start
after the actual time and date are set and the operations under
(SUMMER TIME SET) are completed.
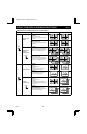
Default clock settings: 01:01:2000 SAT 00:00:00
(January 1, 2000 at 00:00)
1 Press the MENU button twice to display the (CLOCK
SET) menu.
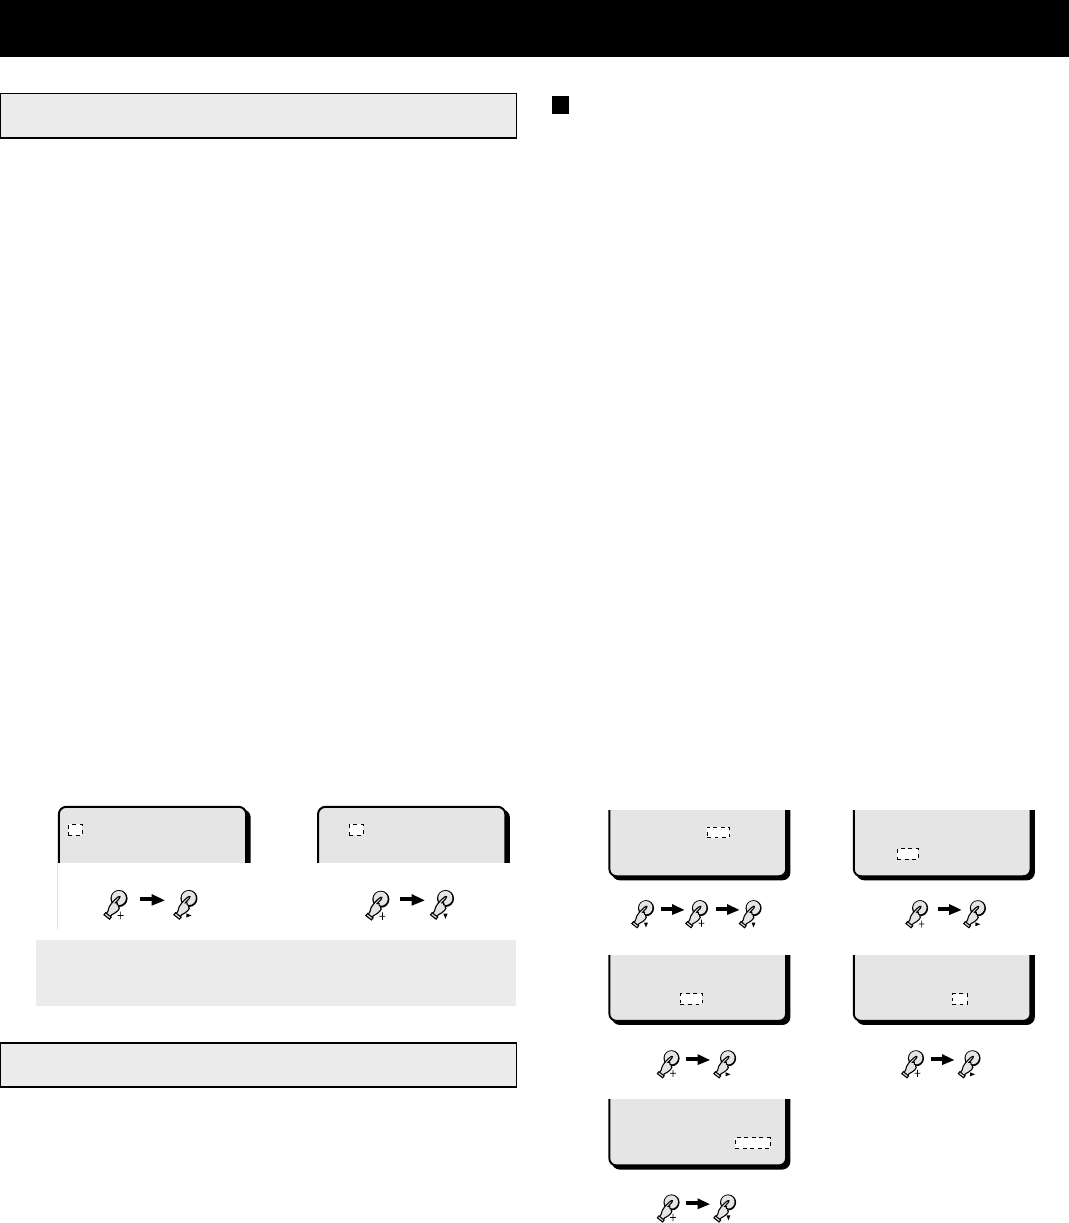
2 Example: Setting the clock to October 15, 1999 at 3:20 PM
1 Press the + (or –) button to set the day (15), then press
the c button.
2 Press the + (or –) button to set the month (10), then
press the c button.
3 Press the + (or –) button to set the year (1999), then
press the c button.
4 Press the + (or –) button to set the hours (15), then
press the c button.
5 Press the + (or –) button to set the minutes (20), then
press the c button.
NOTE: The day of the week (SAT) will be automatically set
according to the date entered.
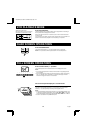
3
☞
Press the l button to go to the (SUMMER TIME SET)
menu.
☞
Press the MENU button to go to the next menu
screen, or
☞
Press the EXIT button to exit the menu display.
NOTE: To set the display mode for the clock, refer to
“DISPLAY SET (CLOCK, TITLE)” on page 22.
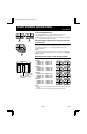
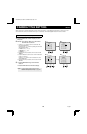
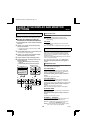
(SUMMER TIME SET)
The default summer time function setting is “NO USE”, so the
summer adjustment will not be made.
If the unit will be used in an area where there is a summer time
change, set it to “USE”, then if necessary, set when the summer
time is changed.
The default settings are:
Summer time from the last Sunday of March, at 2:00 AM
(LST-SUN 03 02:00) to last Sunday of October, at 2:00 AM
(LST-SUN 10 02:00).
TO MAKE CHANGES TO THE SETTINGS
1 Press the l button to highlight the NO USE setting,
then press the + (or –) button to select “USE”, and
press the l button one more time.
2 Example: Setting the summer time from the second
Tuesday of May at 3:00 AM, to the fourth
Tuesday of September at 3:00 AM.
1 Press the + (or –) button to set the WEEK (2ND), then
press the c button.
Setting: 1ST, 2ND, 3RD, 4TH or LST (first, second,
third, fourth or last)
2 Press the + (or –) button to set the WEEK (TUE), then
press the c button.
Setting: SUN, MON, TUE, WED, THU, FRI, SAT or SUN
3 Press the + (or –) button to set the MON (05), then press
the c button.
Setting: 1, 2, 3, 4 ..... 11, 12
(for January, February, March ..... December)
4 Press the + (or –) button to set the TIME (03), then press
the c button.
•
Following the same procedure as above, set when the
time is changed back from daylight saving time to
standard time (the OFF settings).
3
☞
Press the MENU button to go to the next menu
screen, or
☞
Press the EXIT button to exit the menu display.
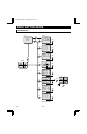
2-
1
2-
2~5
(CLOCK SET)
15-01-2000 SAT 00:00:00
(CLOCK SET)
15-10-1999 FRI 15:20:00
QUAD
VCR LIVEQUAD
QUAD LIVE
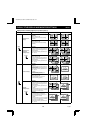
(SUMMER TIME SET)
MODE USE
WEEK MON TIME
ON 2ND-TUE 05 03:00
OFF LST-SUN 10 02:00
2-4
QUAD VCR QUAD VCR
(SUMMER TIME SET)
MODE USE
WEEK MON TIME
ON 2ND-TUE 03 02:00
OFF LST-SUN 10 02:00
(SUMMER TIME SET)
MODE USE
WEEK MON TIME
ON 2ND-TUE 05 02:00
OFF LST-SUN 10 02:00
2-2 2-3
QUAD
QUAD VCR
(SUMMER TIME SET)
MODE USE
WEEK MON TIME
ON LST-SUN 03 02:00
OFF LST-SUN 10 02:00
(SUMMER TIME SET)
MODE USE
WEEK MON TIME
ON 2ND-SUN 03 02:00
OFF LST-SUN 10 02:00
12-1
LIVE LIVE
L8QR5/XE (VQC-801P, VQM-801P GB) 1999. 12. 2
English 17