


63
Editing Redigering
Om du använder en ansluten videobandspelare
för kopiering kan du lätt kontrollera den via
videokameran.
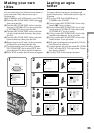
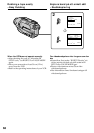
Du kan välja en av åtta förinställda titlar, eller en
av de två titlar du själv kan skriva in. Hur du gör
beskrivs under “Lagring av egna texter” (sid. 55).
Välj färg, storlek och bakgrundsfärg för titlarna.
Använda snabbkopieringsfunktionen
Steg 1 Anslut videobandspelaren (sid. 63).
Steg 2 Ställ in videobandspelaren för
användning med videokameran (sid. 64
till 68).
Steg 3 Välj titel (sid. 69).
Steg 4 Välj kopieringsläge (sid. 70).
Steg 5 Utför snabbkopieringen (sid. 71).
Om du utför kopieringen med samma
videobandspelare igen kan du hoppa över steg 2.
Om du inte vill ha med en titel, kan du hoppa
över steg 3.
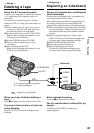
Steg 1: Anslut
videobandspelaren
Anslut enheterna på det sätt som visas på sidan
61.
Du kan utföra redigering med
videobandspelare som kan hantera följande
format:
8 mm , Hi8 , Digital8 , VHS ,
S-VHS , VHSC , S-VHSC ,
Betamax , mini DV eller DV
Om videobandspelaren har en S-videokontakt
Du får optimal bildkvalitet om du ansluter med
en S-videokabel (tillval).
Med den här anslutningen behöver du inte
ansluta A/V-kabelns gula kontakt (video).
Anslut en S-videokabel (tillval) till
S-videokontakten på både videokameran och
videobandspelaren.
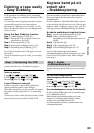
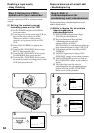
Kopiera band på ett
enkelt sätt
– Snabbkopiering
VCR operation for dubbing can be controlled
easily by using your camcorder when the VCR is
connected.
You can select one of eight preset titles and two
custom titles stored in your camcorder as
instructed in “Making your own titles” (p. 55).
Select the desired colour, size, and background
colour of titles.
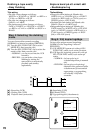
Using the Easy Dubbing function
Step 1 Connecting the VCR (p. 63).
Step 2 Setting the VCR to operate with your
camcorder (p. 64 to 68).
Step 3 Selecting the title (p. 69).
Step 4 Selecting the dubbing mode (p. 70).
Step 5 Performing Easy Dubbing (p. 71).
If you dub using the same VCR again, you can
skip step 2.
If you do not need to put in a title, you can skip
step 3.
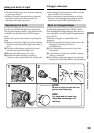
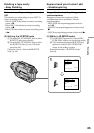
Step 1: Connecting the VCR
Connect the devices as illustrated in page 61.
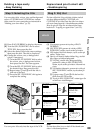
You can edit on VCRs that support the
following systems:
8 mm , Hi8 , Digital8 , VHS ,
S-VHS , VHSC , S-VHSC ,
Betamax , mini DV or DV
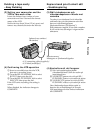
If your VCR has an S video jack
Connect using an S video cable (optional) to
obtain optimum quality screen images.
With this connection, you do not need to connect
the yellow (video) plug of the A/V connecting
cable.
Connect an S video cable (optional) to the S video
jacks of both your camcorder and the VCR.
Dubbing a tape easily
– Easy Dubbing