


33
GB
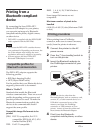
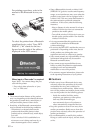
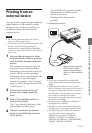
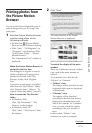
Printing from a PC
Notes
• If a hub is used to connect the printer and
your PC, or if two or more USB devices
including other printers are connected to your
PC, a trouble may occur. If this occurs,
simplify the connections between your PC
and the printer.
• You cannot operate the printer from another
USB device being used simultaneously.
• Do not remove the USB cable from or connect
it to the printer during data communication
or printing. The printer may not work
properly.
• Do not allow the PC connected to the printer
to switch to standby mode or hibernation
mode during printing. If you do so, the
printer may not print properly.
• We cannot guarantee operations with all PCs,
even though they may meet or exceed the
system requirements.
• Picture Motion Browser supports the DirectX
technology and the DirectX installation may
be required.
DirectX is available in the CD-ROM.
• If the Picture Motion Browser is installed on a
PC on which the Cyber-shot Viewer is
already installed, the Cyber-shot Viewer will
be overwritten and replaced by the Picture
Motion Browser. The browsing folders once
registered in the Cyber-shot Viewer will be
automatically registered in the Picture Motion
Browser. When using the Picture Motion
Browser, you can view the folders easier than
you can when using the Cyber-shot Viewer,
as the registered folders are displayed by
group when viewing folders. With its
improved red-eye reduction adjustment and
newly-added tone curve adjustment, the
Picture Motion Browser also offers more
powerful editorial features. You can also use
the software to write data into an external
memory card for taking it outside.
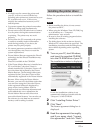
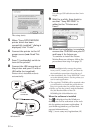
Installing the printer driver
Follow the procedures below to install the
driver.
Notes
• Before installing the driver, do not connect
the printer to the PC .
• When using the Windows Vista/XP/2000, log
on to Windows as a “Computer
administrator” user account.
• Be sure to close all running programs before
installing the software.
• The dialog boxes in this section are those in
Windows XP, unless otherwise specified. The
installation procedures and the dialog boxes
shown differ depending on the operating
system.
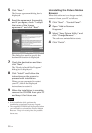
1 Turn on your PC, start Windows,
and insert the supplied CD-ROM
into the CD-ROM drive of your PC.
The installation window is displayed.
Note
In case the installation window is not
automatically displayed, double-click the
“Setup.exe” of the CD-ROM.
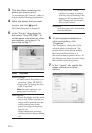
2 Click “Installing Printer Driver”.
3 Click “Next”.
The license agreement dialog box is
displayed.
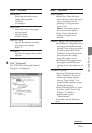
4 Read the agreement thoroughly,
and if you agree, check “I accept
this agreement” and click “Next”.
Continued