


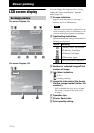

22
GB
Exposure and Red-eye
Correction
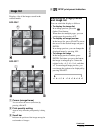
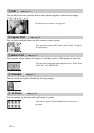
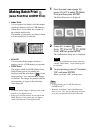
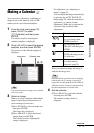
1 Display an image that you want to
adjust and then press the AUTO
TOUCH-UP button.
The correction of the selected image
starts. The results of the adjustment will
be displayed on the screen.
To display the original image
(before correction) again
Press the AUTO TOUCH-UP button. To
display the adjusted image, press the
AUTO TOUCH-UP button again.
To cancel correction
Press CANCEL.
Tip
Although you can check the exposure and red-
eye correction status by pressing ENTER and
enlarging an image, the image to be printed is
not enlarged. To print an enlarged and corrected
image, first enlarge an image and then perform
the correction.
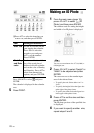
If you have set print quantity for
multiple images
All the images with print quantity settings
are adjusted. To display other images,
press g/G.
To set the print quantity
Before you press the AUTO TOUCH-UP
button, set the print quantity (page 17).
You cannot set or change print quantity
after you finish the correction. To change
the print quantity setting, cancel the
correction.
Tips
• If there are no images with print quantity
settings, the correction adjusts the image
being previewed.
• If there are other images with print quantity
setting, and print quantity is not specified
for the image being previewed, the image
being previewed will not be corrected. The
images with print quantity settings will be
adjusted.
• If you enlarged an image, only the enlarged
image will be adjusted and then printed.
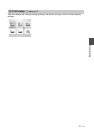
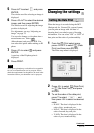
2 Press PRINT.
Printing of the image being adjusted starts.
When the print quantity setting is
specified, the specified number of copies
are printed.
Tips
• Adjustment takes effect only on the image being
printed. The original image will not be adjusted.
• You cannot perform editing on an image after the
correction.
Notes
• Depending on the image, the exposure
phenomenon may not be correctable. In this case,
select “Adjust” from the Edit menu to adjust the
brightness manually (page 23).
• Depending on the image, the red-eye phenomenon
may not be corrected.
• When you cancel the edits by selecting (Reset)
in the Edit menu, the correction will also be
cancelled.
• During the correction process, an animation to
show reading and handling of data from a memory
card or a USB memory will be displayed. While
the animation is displayed, do not remove the
memory card or disconnect USB memory.
• You cannot select only Red-eye Correction or only
Exposure Correction.
• Depending on the condition of the image, the
correction may take some time.
The automatic red-eye
correction of this printer uses
the technology of FotoNation
Inc. in the U.S.A.