28
GB
2Press f/F to select the item that you
want to set, and then press ENTER.
Press g/G/f/F to select and press
ENTER.
The calendar is displayed in the calendar
area.
5 Press PRINT.
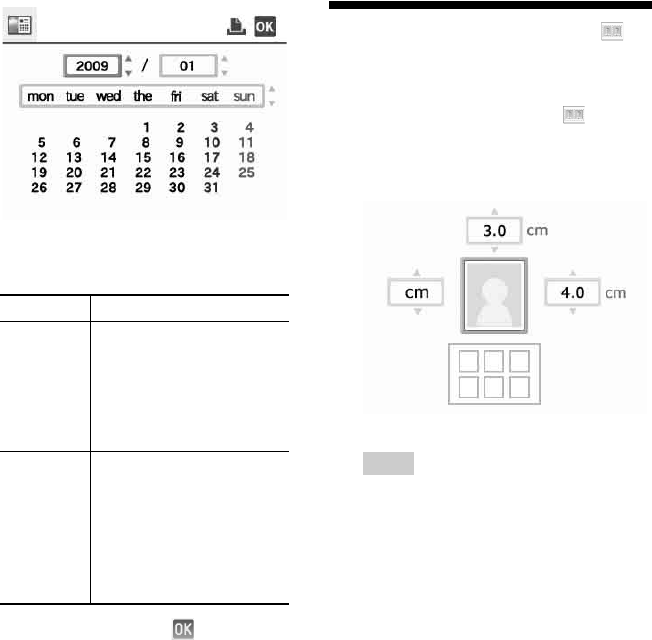
Making an ID Photo
1 From the main menu (page 19),
press g/G/f/F to select (ID
Photo) and then press ENTER.
The window used for setting the height
and width of an ID photo is displayed.
Tip
You can set a maximum size of 7.0 (width) ×
9.0 (height) cm.
2 Press g/G/f/F to select “Height” or
“Width” to be adjusted and press
ENTER.
The cursor moves to the number input
area of the selected item.
• To specify the unit: Select either “cm” or
“inch.”
• To specify the height: Select the figure box
at the right of the photo frame.
• To specify the width: Select the figure box
in the upper of the photo frame.
3 Press f/F to set the size and then
press ENTER.
The ID photo preview of the specified size
is displayed.
4 If you want to specify another size,
repeat steps 2 and 3.
Item Settings/Procedures
Start Y/M Set the first month and the
year starting the calendar.
Press
g/G to select the
month or year and press
f/F to set the number.
Press ENTER.
Start Day
and Date
color
Set the combination of the
day of the week placed
furthest left in the calendar
and set the color of Sunday
and Saturday. Press f/F to
select from among four
options, and press ENTER.


