


40
GB
Notes
• If the installation fails, remove the printer from
your PC, restart your PC, and then follow the
installation procedures from step 1 again.
• After installation, the “Sony DPP-FP67” or “Sony
DPP-FP77” is not yet set as the default printer. Set
the printer you use for each application.
• The supplied CD-ROM will be required when you
uninstall or re-install the printer driver. Keep it for
possible future use.
• Before you use the printer, read the Readme file
(the Readme folder of the CD-ROM c English
folder c Readme.txt).
When the software is installed
The icon is displayed on the Windows
desktop, as well as a shortcut to the web site for
printer customer registration. After you finish
registration, you can find support information
at: http://www.sony.net/registration/di/
Uninstalling the printer driver
When the printer driver becomes unnecessary,
please follow the procedures below to remove
the printer driver:
1Disconnect the USB cable from your printer
and the PC.
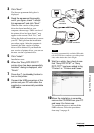
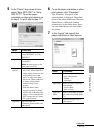
2Insert the supplied CD-ROM into the CD-
ROM drive of your PC.
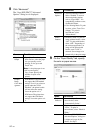
The installation window is displayed.
Note
If the installation window is not displayed
automatically, double-click the “Setup.exe” file
on the CD-ROM.
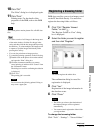
3
Click “Installing Printer Driver.”
The “InstallShield Wizard” dialog box is
displayed.
4Click “Next.”
The license agreement dialog box is
displayed.
5Read the agreement thoroughly, and if you
agree, check “I accept this agreement” and
click “Next.”
The confirmation dialog box used for
removing the software is displayed.
6Click “Yes.”
The confirmation dialog box used for restart
is displayed.
7Check “Yes, I want to restart my computer
now” and click “OK.”
After the computer is restarted, the relevant
files will be deleted and uninstallation is
complete.