42
Shooting with manual adjustment
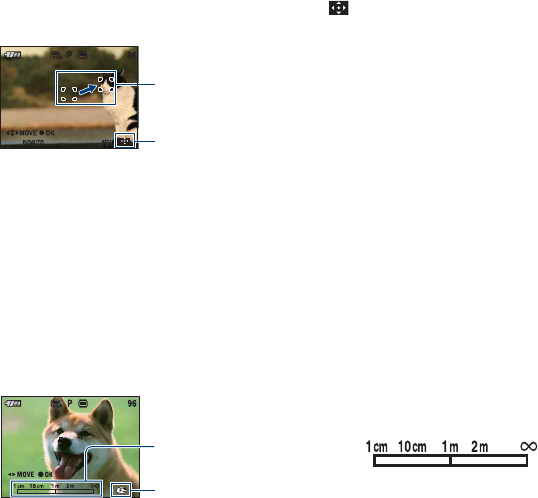
To set the Flexible Spot AF
1 Select the AF range finder frame indicator, then select (Flexible Spot AF).
The color of the AF range finder frame changes from white to yellow.
2 Move the AF range finder frame to the point you want to focus on with v/V/b/B on the control
button, then press z.
The AF range finder frame turns white from yellow.
To move the AF range finder frame again, press z again.
• When the AF range finder frame is being moved, AF mode is set to [Monitor] and pressing z turns to the
mode set on the Setup screen.
• Once you change a focus method, the position of the AF range finder frame you set up is cleared.
To set the manual focus
1 Select the AF range finder frame indicator, then select 9.
The manual focus bar appears.
2 Set the bar to the desired distance with b/B on the control button.
• Using the Expanded focus function (page 82), the image on the screen is expanded double to focus on
easily (The default setting).
3 Press z. 9 changes from yellow to white. To set again, press z again.
• If the distance to set focus on the subject is short, dust or fingerprints on the lens may appear on the image
shot. Wipe the lens clean using a soft cloth, etc.
• Distance setting information in manual focus is approximate. If you point the lens up or down, the error
increases.
• The distance selection is limited according to the zoom scaling or the setting of the [Conversion Lens]. If
9 flashes, it indicates the limitation of focus adjustment.
• Once you change a focus method, the distance of the manual focus you set up is cleared.
AF range finder frame
(yellow: adjustable/white: fixed)
AF range finder frame indicator
Manual focus bar
Focus range 1 cm to ∞
Focus indicator
(yellow: adjustable/white: fixed)
