188
Stilstaande beelden
van een cassette
kopiëren – Foto-opslag
Met de zoekfunctie kunt u automatisch alleen de
stilstaande beelden van een cassette opzoeken,
om deze automatisch in volgorde over te nemen
op een “Memory Stick”.
Alvorens de camcorder te bedienen
•Plaats een opgenomen cassette en spoel de
band terug naar het gewenste beginpunt.
•Plaats een voor opnemen geschikte “Memory
Stick” in de camcorder.
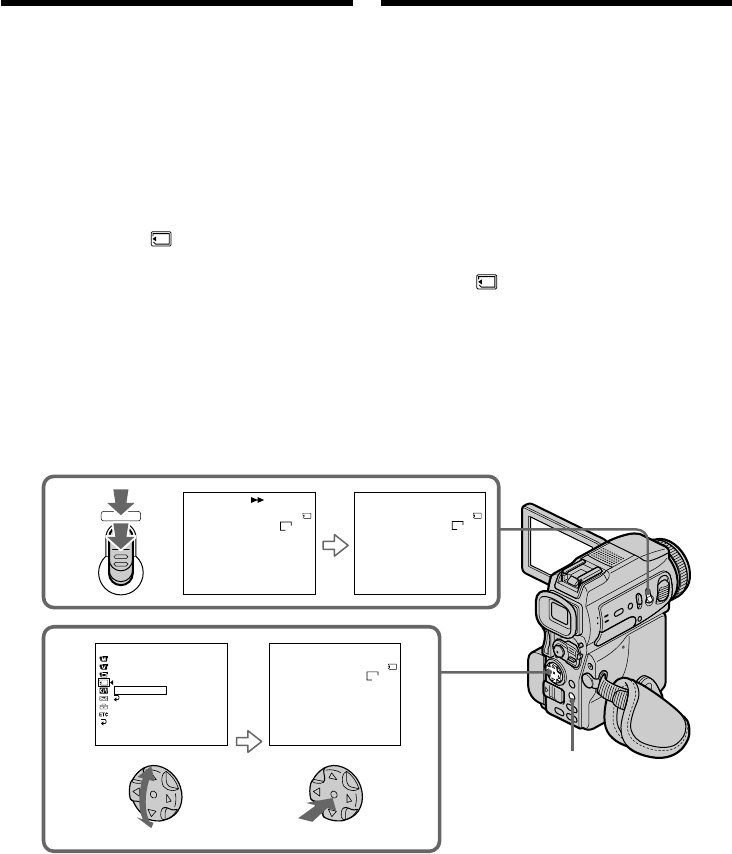
(1)Zet de POWER schakelaar in de “VCR” stand.
(2)Druk op de MENU toets, stel met de
instelknop in op onderdeel PHOTO SAVE
onder het pictogram en druk de
regelknop in (zie blz. 132).
De aanduiding “PHOTO BUTTON” verschijnt
op het scherm.
(3)Druk nu de PHOTO toets stevig in. De
stilstaande beelden van de cassette worden nu
overgenomen op de “Memory Stick”. Het
aantal gekopieerde stilstaande beelden wordt
aangegeven. Wanneer het kopiëren voltooid
is, verschijnt de aanduiding “END”.
Annuleren of stoppen met kopiëren
Druk op de MENU toets.
Wanneer het geheugen van de
“Memory Stick” vol is
De aanduiding “MEMORY FULL” verschijnt op
het LCD scherm of in de zoeker en het kopiëren
stopt. Vervang de “Memory Stick” door een
andere en volg weer de aanwijzingen vanaf
stap 2.
Copying still images
from a tape
– Photo save
Using the search function, you can automatically
take in only still images from tapes and record
them on a “Memory Stick” in sequence.
Before operation
•Insert a recorded tape into your camcorder and
rewind the tape.
•Insert a “Memory Stick” into your camcorder.
(1)Set the POWER switch to VCR.
(2)Press MENU, then select and decide upon
PHOTO SAVE in with the control button
(p. 132).
PHOTO BUTTON appears on the screen.
(3)Press PHOTO deeper. The still image from the
tape is recorded on a “Memory Stick.” The
number of still images copied is displayed.
END is displayed when copying is completed.
To stop copying
Press MENU.
When the memory of the “Memory
Stick” is full
MEMORY FULL appears on the screen, and the
copying stops. Insert another “Memory Stick”
and repeat the procedure from step 2.
3
2
PHOTO
SAV
I
NG
0
[
MENU
]
:
END
PHOTO SAVE
4/15
0
:
00
:
00
:
00
END
4
[
MENU
]
:
END
PHOTO SAVE
8/15
0
:
30
:
00
:
00
PHOTO BUTTON
[
PHOTO
]
:
START
[
MENU
]
:
END
PHOTO SAVE
4/15
0
:
00
:
00
:
00
MEMORY SET
STILL SET
MOV I E SET
PRINT MARK
PROTECT
READYPHOTO SAVE
RETURN
[
MENU
]
:
END
640
STD
640
STD
640
STD
MENU


