


66
Notes on audio dubbing
• A new sound cannot be recorded on a tape already recorded in the 16-bit mode (32 kHz,
44.1 kHz or 48 kHz).
• When an external microphone is not connected, the recording will be made through the
built-in microphone of the camcorder.
• A new sound cannot be recorded on a tape already recorded in the LP mode.
• If you add a new sound on a tape recorded with another camcorder (including DCR-
TRV9), the sound quality may become worse.
• When you record a playback pause picture with the DV jack, you cannot add audio to that
portion of the tape.
• You cannot add audio with the DV jack.
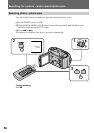
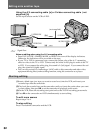
Adding an audio sound on a recorded tape
(1) Insert your recorded tape into the camcorder.
(2) While pressing the small green button on the POWER switch, set it to VTR.
(3) On the camcorder, locate the point where the recording should begin by pressing 0 or
). Then press P to set it to playback pause mode.
(4) Press AUDIO DUB on the Remote Commander .
(5) Press P on the Remote Commander and at the same time start playing back the audio
you want to record. The new sound will be recorded in stereo 2. The recorded sound in
stereo 1 is not heard.
(6) Press p on the Remote Commander at the point where you want to stop recording.
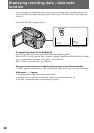
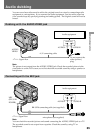
To play back the new recorded sound
Adjust the balance between the original sound (ST1) and the new sound (ST2) by selecting
AUDIO MIX in menu system.
Five minutes after when you disconnect the power source or remove the battery pack, the
settings of AUDIO MIX return to the original sound (ST1) only. The factory setting is
original sound only.
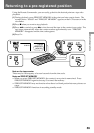
To end audio more precisely
First, press ZERO SET MEMORY on the Remote Commander at the point where you want to
stop recording. Then start recording from step 2, and the recording stops automatically near
the counter’s zero point.
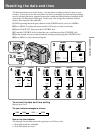
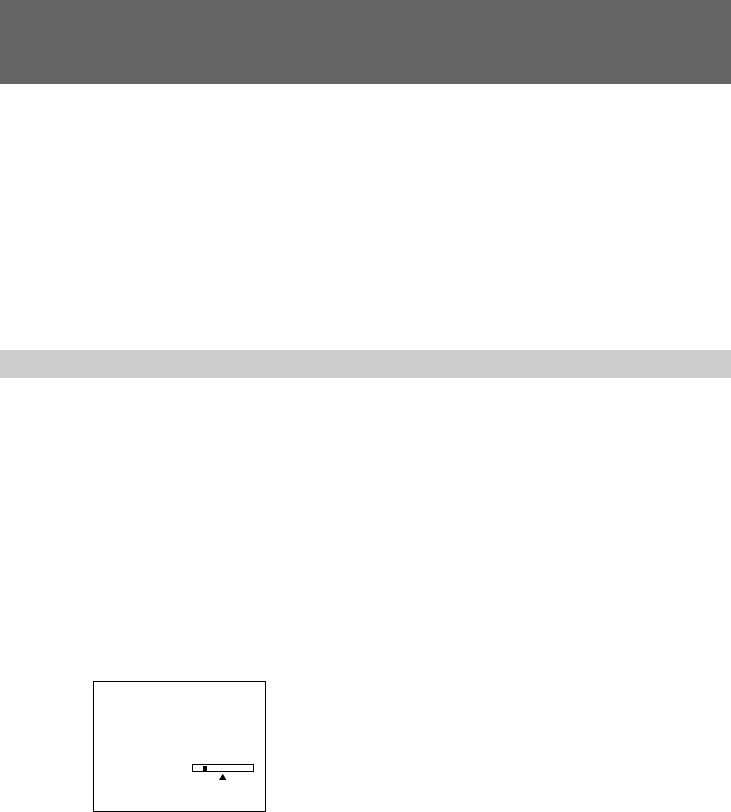
Audio dubbing
MENU
[]
MENU
AUDIO MIX
ST1 ST2
:END