14
TANDBERG FieldView Device User Guide
D14041.02 January 2008
5. ViewnderFeatures&DisplayModes
The display on the back of the FieldView Device functions as a camera
viewnder. By default, it shows what the lens at the front of the FieldView
Device is viewing, but it can also provide status information and menus.
Depending on the display mode, the Viewnder uses a status bar, icons and
popup windows to provide information, notications and prompts as necessary.
Note that status bar information and menus only appear for the FieldView
Device Operator. This information does not appear for the FieldView Application
client software user who is receiving streamed information.
5.1. ControllingtheViewnderMode
To control the Viewnder mode, press the Display button on the back of
the FieldView Device. Starting from the Default mode that appears when the
FieldView Device rst turns on, Operators can press Display one or more
times to switch the Viewnder into a different mode, as described below.
Displaybutton Result
Press and hold Toggles the display backlight on or power save.
Press and release once Session information displayed.
Press and release second
time
Stream information displayed.
Press and release third
time
Main Menu displayed—for conguration and
other setup options.
Press and release fourth
time
Display returns to default Viewnder mode.
5.1.1. TurnViewnderBacklightOnorPowerSave
If you are in a call that does not require the Viewnder backlight, the Operator
can press and hold the Display button until the backlight dims and enters
power-saving mode. Press and hold the button again to turn the backlight back
on. Placing the backlight in power save extends run time when operating on
battery.
Note: The default backlight level can be set from the FieldView Device
conguration screen available from the Main Menu.
5.1.2. DefaultViewnderMode
This is the default mode that appears when you rst turn the camera on.
Viewnder mode maximizes the visible video area by providing as little
extraneous screen information as possible. The Status bar area is blank, but
icons, pop-up notications and prompts appear as necessary.
5.1.3. Session Information
Starting from the default viewnder, press Display once to display session
information in the Status bar. The viewnder shows live camera video and
status information as shown at right.
5.1.4. Streaming Status
Starting from the default viewnder, press Display twice to display stream
information in the Status bar. The viewnder shows live camera video and
status information as shown at right.
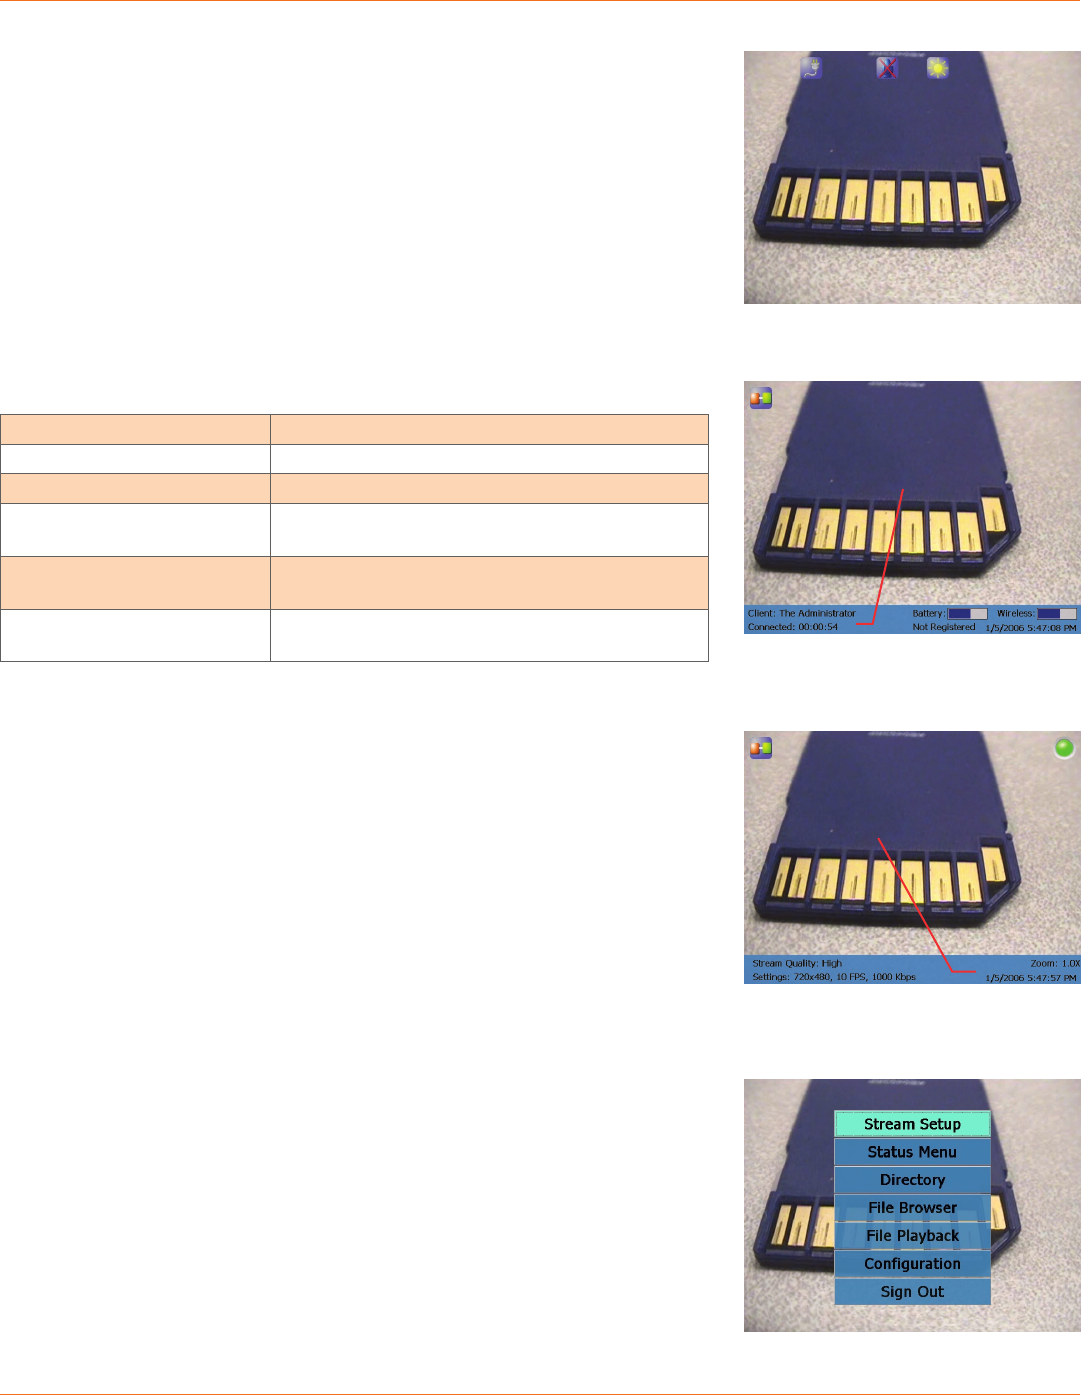
5.1.5. ViewnderMainMenu
Starting from the default viewnder, press Display three times to display the
Main Menu. The viewnder shows live camera video and the menu as shown
at right. For more information on the Main Menu and other menu options, see
page 15.
Click the Display button once for Session
information.
Client Identier,
Connect time, Date/
Time, Battery level,
Radio signal strength.
Click the Display button twice for Streaming
status information.
Stream video size,
bit rate, FPS (frame
rate), quality, Zoom
level.
Default Viewnder mode.
Click the Display button three times to
display the Main Menu.


