Page 35 of 69
[Add A New Scene] Add a new video or picture to your movie. You can either add an
existing video/picture from your computer or record a new video/picture
from your Veo camera for insertion.
[Add Background Music] Add music to your movie.
[Remove Music] Remove music from your movie.
When you are done, click Continue.
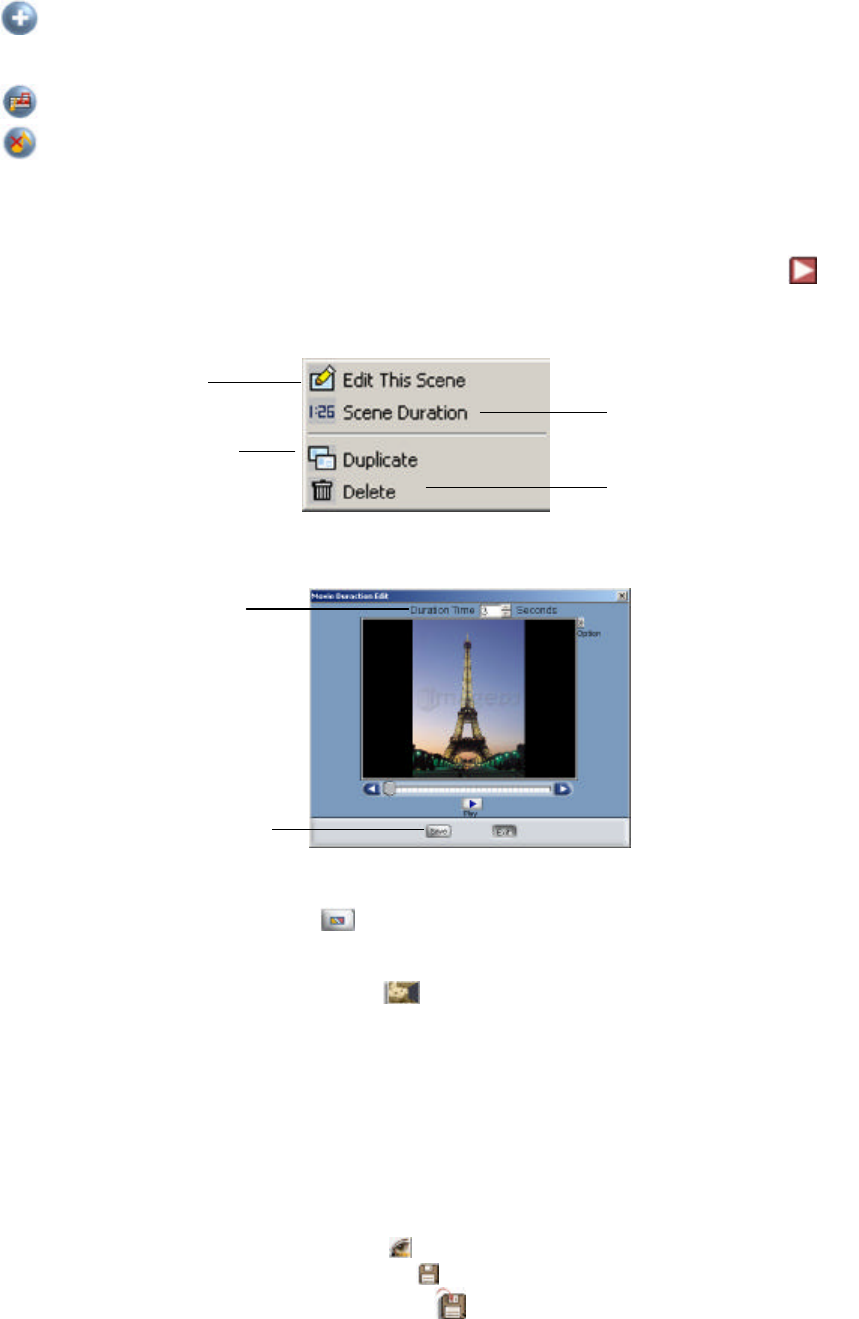
Note: By default, still pictures will be shown in the movie for three (3) seconds. To change the duration of
pictures in the movie or view other options, select your still picture and then click . The following box
will appear:
Select Scene Duration.
Note: Video (.avi) files also have a [Trim Video] button that allows you to adjust the size and length of the
video. Refer to Page 28 for more information.
Click Continue when you are done.
4. Select a scene from the bottom and click [Transition Effect].
5. Sample the effects by placing your cursor above each individual effect. Choose the opening effect (how one
scene changes to another).
6. Double-click on the remaining scenes in the Movie Maker, then repeat steps 4 and 5 above to apply opening
effects to the remaining scenes. Click Continue when you are finished.
7. Select a scene to edit by double-clicking on the scene in the Movie Maker. Make sure the scene shows up in
the Main Screen.
8. Edit the selected scene.
(See “Applying Text, Images, Videos, and Animated Characters” on Page 34 for more on editing a scene). Click
Continue when you are done.
9. Repeat steps 7 and 8 to edit the remaining scenes. When you are finished, click Continue.
10. a) To preview the complete movie, click [Preview].
b) To save the movie for editing later, click [Save].
c) To save the movie as a separate file, click [Save As].
d) To save the movie on your computer, click Save Finished Movie.
Save Changes
Set Duration
Duplicate the scene
scene and other options
Edit the scene


