Advanced Configuration and Management Guide
3. Click on the plus sign next to BGP in the tree view to expand the list of BGP option links.
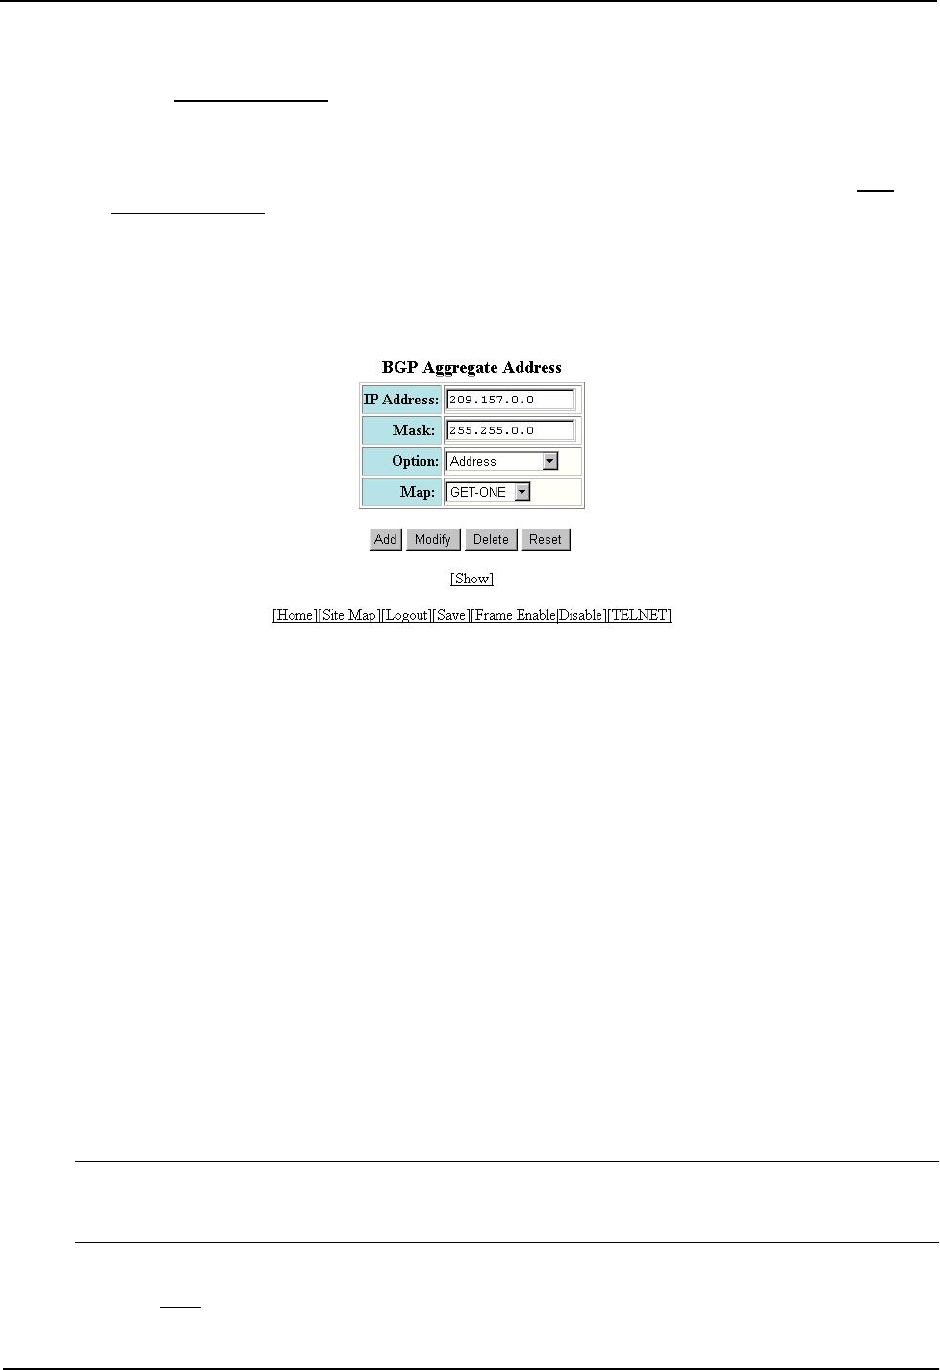
4. Click on the Aggregate Address
link to display the BGP Aggregate Address configuration panel.
• If the device does not have any BGP aggregate addresses configured, the BGP Aggregate Address
configuration panel is displayed, as shown in the following example.
• If a BGP aggregate address is already configured and you are adding a new one, click on the Add
Aggregate Address link to display the BGP Aggregate Address configuration panel, as shown in the
following example.
• If you are modifying an existing BGP aggregate address, click on the Modify button to the right of the row
describing the aggregate address to display the BGP Aggregate Address configuration panel, as shown
in the following example.
5. Enter the aggregate address in the IP Address field. Specify 0 for the host portion and for the network portion
that differs among the networks in the aggregate. For example, to aggregate 10.0.1.0, 10.0.2.0, and 10.0.3.0,
enter the IP address 10.0.0.0. Then enter 255.255.0.0 in the Mask field.
6. Enter the mask in the Mask field.
7. Select one of the following options from the Option field’s pulldown list:
• Address – Use this option when you are adding the address. This is the default option.
• AS Set – This option causes the router to aggregate AS-path information for all the routes in the
aggregate address into a single AS-path.
• Summary Only – This option prevents the router from advertising more specific routes contained within
the aggregate route.
• Suppress Map – This option prevents the more specific routes contained in the specified route map from
being advertised.
• Advertise Map – This option configures the router to advertise the more specific routes in the specified
route map.
• Attribute Map – This option configures the router to set attributes for the aggregate routes based on the
specified route map.
8. Optionally select a route map from the Map field’s pulldown list.
NOTE: For the Suppress Map, Advertise Map, and Attribute Map options, you must select a route map and
the route map must already be defined. See “Defining Route Maps” on page 10-59 for information on
defining a route map.
9. Click the Add button to apply the changes to the device’s running-config file.
10. Select the Save link at the bottom of the dialog. Select Yes when prompted to save the configuration change
to the startup-config file on the device’s flash memory.
10 - 40
