


18
AXIS M1011/M1011-W/M1031-W - Video & Audio Settings
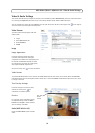
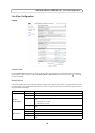
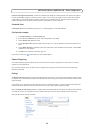
Audio Input
If the sound input is too low or too high, adjust the input gain for the network camera’s built-in microphone.
Select the desired audio En
coding format, AAC, G711, G726.
If AAC is selected, select the required Sample rate (number of times per second the sound is sampled). The higher the sample
rate, the better the audio quality and the greater the bandwidth required.
Depending on the selected encoding,
set the desired audio quality (Bit rate). These settings affect the available bandwidth and
the required audio quality.
The network camera can be set to trigger an event if the incomi
ng sound level rises above, falls below, or passes the set value
in either direction. The Alarm level is set between 0-100%.
Audio Output
If the sound from the speaker is too low or too high, adjust the output gain for the camera’s speaker.
When satisfied with the settings, click Save, or click Re
set to revert to previously saved settings.
Note:
To receive synchronized video in H.264/MPEG-4 and audio, it is recommended that the time settings in the camera
and client computer are synchronized with an NTP Server. This is enabled in the camera under System Options > Date
& Time. Please refer to the help pages for more information.
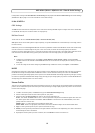
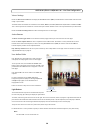
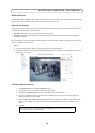
Audio Clips (AXIS M1031-W)
The AXIS M1031-W can play audio clips. Audio clips are created either by recording sound using the camera’s microphone or
by uploading a sound file to the camera. Audio clips can be played when an event occurs or manually from the Live View page.
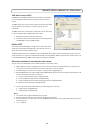
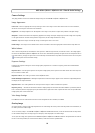
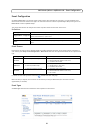
Add a new audio clip
New audio clips can be recorded or uploaded to the network camera. Click the New button. The dialog expands with three
choices Record, Upload and URL.
To record a new clip using
the camera's microphone:
1. Select the Re
cord radio button.
2. Name - Enter a descriptive name.
3. Duration - Enter the number of seconds to record.
4. Wait - If the recording should not start at once upon clicking the Record button, enter the number of seconds to wait
before recording will proceed.
5. Click Record.
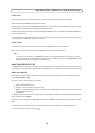
To upload a file from a local hard drive or network disk,
select the Upload radio button and click the Browse button. Navigate
to the desired file and click Upload.
To upload a file from a URL, select the UR
L radio button and enter the Name and the URL address under Location. Click Add
URL.
Allowed audio clips for uploading are.au files with G711/CCITT u-law encoding in 80
00 Hz or 16000 Hz sample rate.
For more information refer to the online help .