


AXIS 2120 User’s Manual Configuring Your Camera
21
Configuring Your Camera
Important!
Before You Begin
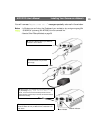
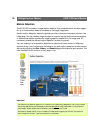
Having chosen the type of application you want to develop and having installed the
product accordingly, your AXIS 2120 will now be attached directly to a local area network,
or connected to a PC using the supplied Null Modem Cable. You are now ready to proceed
with the unit’s configuration.
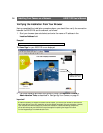
This section describes how to use the Wizards for configuring and integrating the AXIS
2120 into your application environment, and provides a general overview of the
Web-based Administration Tools.
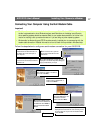
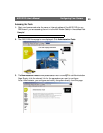
Configuration Using the Wizards
For speedy development of your application, the AXIS 2120 supports two easy-to-use
Wizards that are recommended for both novice and advanced users alike. Depending upon
your choice of application, the Installation Wizard and the Application Wizard can be run
either consecutively, or independently of one another.
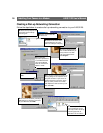
Important!
Javascript must be enabled in your Web browser for the AXIS 2120 Web-based interface to work.
Successful installation of the product is prerequisite to configuring the unit; therefore, it is recommended that you
read the following information before commencing with this section:
• Choosing Your Application, on page 29, and then...
• Installing Your Camera on a Network, on page 12, ...or
• Installing Your Camera to a Modem, on page 15.
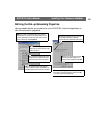
• When accessing the Administrator Tools for the first time during a session, you will be assumed to be
the administrator and will be logged in as such, with the username root
and default password pass.
• You must change the root password as soon as possible. Until this has been done, the security fea-
tures in the product be will not
be enabled. Furthermore, all Axis products are shipped with the same
password by default. For further information, refer to System Security, on page 25.
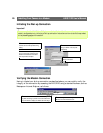
• Prior to accessing the Installation Wizard or Administration Tools over a network
, you must first set
the Internet address, as described in Installing Your Camera on a Network, on page 12.