


26
AXIS Camera Station - How to...
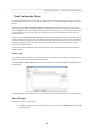
Set up recording storage
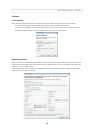
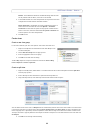
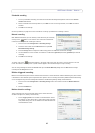
To specify where to store your recordings select
Configuration > Recording Storage. To prevent the hard
drive from becoming full a maximum disk capacity
should be set. Additional server and network disks can be
added for security and more space.
1. Click on Add server disk or Add network
di
sk.
2. Enter the path of the disk and click OK to
save.
3. Select the newly added disk.
4. With the slidebar set the maximum disk
space to be used by AXIS Camera Station.
To change the location of where recordings will be stored, click Edi
t and enter
a new directory.
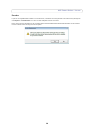
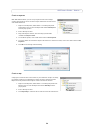
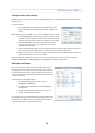
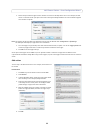
Recording storage settings for cameras
To enter or change storage settings for individual cameras from Configuration > Recording Storage:
1. Select the camera by clicking on it under Came
ras.
2. Click Edit and the Edit Camera Recording Storage Settings dialog opens.
3. Choose the disk to save recordings to from the drop-down list Record to disk.
4. Set the number of days to keep recordings. By default the recordings are set to ‘Unlimited’.
5. Click OK to save settings.
To enter default storage settings for all newly added camer
a
s, click Default Settings under Cameras.
Note: Maximum drive space has precedence over the number of days to keep recordings. Recordings will be deleted if there
is no room left in the allotted drive space.
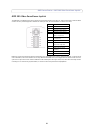
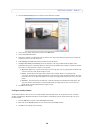
Set up recording
Recordings can be continuous, scheduled, manual or triggered by motion or alarm. Media profiles can be created for each type
of recording for, among other settings, optimal frame rate and resolution. See Configure media profile settings, on page 29 for
more information.
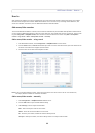
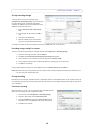
Continuous recording
With this option, the server is set to continuously save video. Note that this
option uses more disk space than a triggered recording.
1. Click on menu items Configuration > Recording Settings.
2. Select the camera and click the Continuous button.
3. Check the Enabled box and choose a Video setting from the
drop-down list or click Change to make a new video setting.
4. Click OK to save settings.